DIY Smart Home Projects: Automate Your Home This Weekend

Anúncios
Achieving a smart home is now more accessible than ever, enabling homeowners to automate various functions through manageable DIY projects that enhance convenience, security, and energy efficiency, often completed within a single weekend.
Transforming your living space into a smart home doesn’t require a large budget or extensive technical expertise. In fact, many DIY Smart Home Projects: 5 Easy Upgrades to Automate Your Home in a Weekend are surprisingly straightforward, offering immediate enhancements to convenience, security, and energy efficiency. This guide explores accessible upgrades that empower you to take control of your home’s intelligence, often achievable in just a few hours.
Embracing the Smart Home Revolution: Why DIY?
The concept of a smart home has evolved from futuristic dream to everyday reality, driven by advancements in technology and a growing desire for integrated, responsive living spaces. Automation promises not just convenience but tangible benefits like increased security, optimized energy use, and enhanced accessibility. For many, the perception of complexity or high cost has been a barrier, but the rise of accessible DIY solutions has fundamentally changed this landscape.
Opting for do-it-yourself smart home projects carries several distinct advantages. It provides a deeper understanding of your home’s systems, fostering a sense of accomplishment and empowering you with problem-solving skills. Furthermore, DIY approaches often equate to significant cost savings compared to professional installations, allowing you to gradually build out your smart home ecosystem without breaking the bank. This hands-on approach also offers unparalleled customization, ensuring that your automated solutions perfectly align with your specific needs and lifestyle.
Understanding the Core Principles of Smart Home Automation
Before diving into specific projects, it’s beneficial to grasp the fundamental principles that underpin smart home automation. At its heart, automation involves devices communicating with each other and with centralized control systems, often via a hub or a dedicated application. These communications rely on various protocols, each with its own strengths and applications.
- Wi-Fi: Ubiquitous and requires no additional hub for many devices, making it a popular choice for standalone smart plugs and cameras.
- Bluetooth: Ideal for short-range communication, often found in personal devices and direct connections to smartphones.
- Zigbee/Z-Wave: Low-power mesh networks designed specifically for smart home devices, offering reliability and scalability.
The decision to build a smart home is more than just adding gadgets; it’s about creating an interconnected environment that anticipates your needs and responds intelligently. Whether it’s setting automated lighting schedules, controlling your thermostat from afar, or enhancing security with intelligent cameras, the goal is a cohesive system that elevates your daily living experience.
By understanding these basic concepts, you can approach DIY smart home projects with confidence, selecting devices and systems that are compatible and truly enhance your home’s functionality. The beauty of DIY lies in its iterative nature; you can start small and expand your smart home capabilities as your comfort and budget allow, making the journey as rewarding as the destination.
Project 1: Smart Plugs – The Gateway to Automation
Smart plugs are arguably the simplest and most accessible entry point into home automation. Their appeal lies in their ease of installation and immediate utility. Essentially, a smart plug is an adapter that fits into an existing electrical outlet, allowing you to control any device plugged into it via a smartphone app, voice commands through a smart assistant, or automated schedules. This project often takes mere minutes to set up, offering instant gratification.
Consider the myriad of possibilities. A traditional coffee maker can become “smart” by simply plugging it into a smart plug, allowing you to start brewing from bed. Lamps can be scheduled to turn on at dusk or dimmed for movie night, all without leaving the couch. Fans, humidifiers, and even holiday lights can be brought into the automated fold. The versatility of smart plugs makes them an indispensable tool for anyone looking to dip their toes into the smart home pond.
Choosing the Right Smart Plug for Your Needs
While most smart plugs share core functionalities, there are variations to consider. Some models offer energy monitoring, providing insights into appliance power consumption, which can be invaluable for identifying energy vampires and optimizing usage to save on utility bills. Others are designed for outdoor use, allowing you to automate garden lights or patio misters. Compatibility with your preferred smart home ecosystem (e.g., Apple HomeKit, Google Home, Amazon Alexa) is also a crucial factor to ensure seamless integration and control.
- Energy Monitoring: Track power consumption of connected devices.
- Outdoor Use: Weather-resistant options for exterior applications.
- Ecosystem Compatibility: Ensure it works with your existing smart home platform.
The installation process is straightforward: plug it in, download the manufacturer’s app, and follow the on-screen instructions to connect it to your home’s Wi-Fi network. Once connected, you can name the device, add it to rooms or groups, and begin creating schedules or routines. This initial project lays a solid foundation, familiarizing you with the fundamental principles of smart device control and preparing you for more complex automation endeavors.
The beauty of smart plugs is their non-invasive nature; they don’t require any modification to your existing appliances or electrical wiring, making them perfect for renters or those hesitant about more permanent installations. They offer a simple yet powerful way to introduce automation into your daily life, transforming ordinary devices into smart, responsive components of your connected home.
Project 2: Smart Lighting – Setting the Mood, Saving Energy
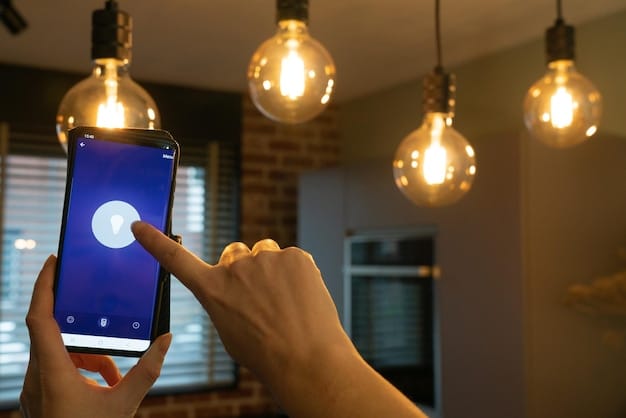
Smart lighting systems represent a significant leap from traditional illumination, offering unparalleled control over your home’s ambiance, security, and energy consumption. Unlike smart plugs that convert existing appliances, smart lighting involves replacing conventional bulbs with intelligent counterparts or installing smart switches that control your current fixtures. This project provides a palpable transformation, elevating your home’s atmosphere and functionality.
The advantages extend beyond mere on/off control. Smart bulbs often allow for color temperature adjustments, transitioning from crisp cool whites for productive workspaces to warm, inviting tones for evening relaxation. Many even boast a full spectrum of RGB colors, enabling you to tailor the lighting to any mood or occasion—a far cry from the static options of yesteryear. Beyond aesthetics, smart lighting can be programmed with schedules, respond to motion sensors, or even simulate occupancy when you’re away, enhancing security.
Choosing Between Smart Bulbs and Smart Switches
When embarking on a smart lighting project, you generally have two main approaches: individual smart bulbs or smart light switches. Smart bulbs are ideal for fixtures where you want individualized control and color-changing capabilities, such as desk lamps or accent lighting. They are easy to install, simply screwing into existing sockets.
- Smart Bulbs: Best for individual fixture control, color changes, and direct voice commands to specific lamps.
- Smart Switches: Ideal for controlling entire light circuits (like ceiling lights), maintaining traditional switch functionality, and for a more permanent smart lighting solution.
Smart switches, on the other hand, replace your standard wall switches and are perfect for controlling overhead lights or groups of lights connected to a single switch. While they may require a bit more comfort with basic electrical wiring (always turn off power at the breaker!), they maintain the convenience of physical switch control while adding smart capabilities. The choice often comes down to the specific functionality you desire and your comfort level with installation, but both offer powerful ways to automate your home’s illumination.
Regardless of the chosen method, smart lighting systems typically integrate with voice assistants and can be controlled through intuitive apps, making the process of adjusting your home’s illumination seamless and enjoyable. This project not only enhances the aesthetic appeal and comfort of your living space but also acts as a powerful tool for energy management, allowing you to optimize lighting usage and reduce your carbon footprint.
Project 3: Smart Thermostats – Intelligent Climate Control
A smart thermostat is one of the most impactful DIY smart home upgrades, offering significant benefits in energy savings and comfort. Unlike traditional thermostats, smart thermostats learn your habits, sense occupancy, and can be controlled remotely, giving you unprecedented control over your home’s climate. This project involves replacing your existing thermostat, a task that is often surprisingly straightforward for most homeowners.
The core value proposition of a smart thermostat lies in its ability to optimize heating and cooling schedules based on real-time factors. Many models feature geofencing, which detects when you’re approaching or leaving home, adjusting the temperature accordingly to save energy while ensuring comfort upon arrival. They can also integrate with local weather forecasts, further fine-tuning their operation. The intuitive apps associated with these devices provide detailed energy reports, helping you understand and reduce your energy consumption.
Installation and Configuration Tips for Smart Thermostats
Installing a smart thermostat typically involves turning off power to your HVAC system at the breaker, carefully labeling and disconnecting existing wires, and then connecting them to the new smart thermostat. While basic wiring knowledge is helpful, most manufacturers provide detailed instructions, and many even offer in-app guides that walk you through the process step-by-step. Some older homes may require a C-wire (common wire) for continuous power, but solutions like power-extender kits are available if one is missing.
- Safety First: Always turn off power at the breaker before beginning.
- Wire Labeling: Label all wires clearly before disconnecting.
- C-Wire Check: Verify if your system needs a common wire for power.
Once installed, the configuration process is primarily done through a smartphone app, where you connect the thermostat to your Wi-Fi, set up your home’s profile, and begin creating schedules. Many smart thermostats are also compatible with various smart home ecosystems, allowing for voice control and integration with other devices. This synergy means your smart thermostat can work in conjunction with smart lighting or smart blinds, further optimizing your home’s energy efficiency and comfort automatically.
While the initial outlay for a smart thermostat might seem higher than other DIY projects, the long-term energy savings often justify the investment, making it a wise and sustainable upgrade for any home. It’s an upgrade that pays for itself while providing a tangible increase in daily comfort and convenience.
Project 4: Smart Security Cameras – Vigilance Made Easy
Enhancing your home’s security is a top priority for many, and smart security cameras offer an accessible and effective DIY solution. Gone are the days of complex wiring and professional installation; modern smart cameras are designed for easy setup, offering peace of mind through remote monitoring and intelligent alerts. This project focuses on integrating surveillance into your existing smart home ecosystem.
The functionality of smart security cameras extends far beyond simple video recording. Most models offer high-definition video, night vision, and two-way audio, allowing you to see, hear, and speak to visitors (or intruders) remotely. Motion detection with customizable zones helps minimize false alarms, while cloud storage options provide secure access to recorded footage. Whether you’re at work, on vacation, or simply in another room, a smart camera provides a virtual presence, ensuring you’re always aware of what’s happening at home.
Placement and Privacy Considerations for Smart Cameras
Strategic placement is key to maximizing the effectiveness of a smart security camera. For indoor cameras, consider areas with high traffic, such as entryways or living rooms, or specific points of interest like pet areas or children’s rooms. For outdoor cameras, focus on monitoring entry points like front doors, backyards, and driveways, ensuring a clear view without obstructions. Always be mindful of privacy, both your own and that of your neighbors, when positioning outdoor cameras to avoid capturing public spaces unnecessarily.
- Key Placements: Entryways, high-traffic areas, vulnerable access points.
- Privacy Awareness: Avoid recording public spaces or neighboring properties without consent.
- Power Source: Ensure access to an electrical outlet or consider battery-powered options.
Installation typically involves mounting the camera (often with simple screws or adhesive options), plugging it into a power source, and connecting it to your home Wi-Fi network through a dedicated app. Some models are battery-powered, offering greater flexibility in placement but requiring periodic recharging. The app interface allows you to define motion zones, set up alerts, and review recorded events, transforming your smartphone into a portable security hub.
While smart cameras are an excellent deterrent and monitoring tool, they are best employed as part of a broader security strategy. Paired with smart locks or contact sensors, they create a more comprehensive security blanket, providing layered protection for your home. This DIY project offers an accessible way to bolster your home’s defenses, giving you unparalleled peace of mind wherever you are.
Project 5: Smart Door Locks – Keyless Convenience and Control
Upgrading to a smart door lock is a transformative step towards modernizing your home’s security and accessibility. Beyond the obvious benefit of keyless entry, smart locks offer a suite of intelligent features that enhance convenience and control over who enters your home. This DIY project, while often perceived as complex, is typically manageable for anyone comfortable with basic hand tools and following clear instructions.
The primary appeal of a smart lock is the ability to unlock your door using a smartphone app, a keypad code, or even your fingerprint, eliminating the need for traditional keys. This is particularly useful when you’re juggling groceries, have house guests, or need to grant temporary access to a delivery person or a dog walker. Many smart locks also integrate seamlessly with voice assistants, allowing for hands-free control, and some models even offer auto-locking features, ensuring your door is always secure when you leave.
Considerations for Smart Lock Selection and Installation
When selecting a smart door lock, consider compatibility with your existing door hardware (e.g., deadbolt type), the power source (battery-powered for ease of installation, hardwired for continuous power), and integration with your broader smart home ecosystem. Features like temporary access codes, activity logs, and tamper alarms add layers of security and control. The installation process usually involves removing your existing deadbolt and replacing it with the smart lock mechanism, followed by calibration and app setup.
- Compatibility: Check door thickness and existing deadbolt type.
- Power Source: Choose between battery-powered convenience or hardwired reliability.
- Features: Look for temporary codes, activity logs, and seamless integration.
Most smart lock installations are designed to be DIY-friendly, with manufacturers providing detailed step-by-step guides and sometimes even video tutorials. While it requires a degree of precision and patience, the result is a significant upgrade to your home’s security and daily convenience. Once installed, the lock connects to your home Wi-Fi or a smart home hub, allowing you to manage access, monitor activity, and receive notifications directly on your smartphone.
A smart door lock not only modernizes your entryway but also provides enhanced security features, giving you ultimate control over who enters your home, even when you’re not there. This project is a tangible step towards a truly automated and secure living environment, bringing peace of mind with every lock and unlock.
Beyond the Basics: Expanding Your Smart Home Ecosystem
Once you’ve tackled these five foundational DIY smart home projects, you’ll likely feel a surge of confidence and a desire to further expand your automated haven. The beauty of smart home technology lies in its modularity and interconnectedness, allowing you to build upon your initial successes and integrate more sophisticated functionalities. The journey doesn’t end with smart plugs or lights; it merely begins.
Consider delving into environmental controls beyond just thermostats, such as smart air purifiers or humidity sensors that automatically activate exhaust fans. Explore smart blinds or shades that adjust based on daylight, enhancing energy efficiency and privacy. Dive into home entertainment with smart TVs, soundbars, and universal remotes that consolidate control of all your media devices. Each addition can incrementally enhance your home’s intelligence and responsiveness.
Integrating and Automating with Smart Home Hubs and Routines
As your collection of smart devices grows, the concept of a central smart home hub becomes increasingly appealing. While many individual devices can operate standalone, a hub (like Amazon Echo, Google Nest Hub, or SmartThings) acts as a central brain, allowing different brands and protocols to communicate seamlessly. This enables the creation of complex routines and automations that orchestrate multiple devices simultaneously.
- Centralized Control: Manage all devices from a single interface.
- Cross-Compatibility: Link devices from different brands.
- Advanced Automations: Create sophisticated routines for daily life.
Imagine a “Good Morning” routine that slowly brightens your bedroom lights, starts your coffee maker, and adjusts the thermostat before your alarm even rings. Or a “Leaving Home” routine that locks the doors, turns off all lights, and sets the alarm system with a single voice command. These advanced automations are where the true power of a smart home truly shines, transforming a collection of smart gadgets into a cohesive, intelligent living environment.
The iterative nature of DIY smart home projects allows for continuous learning and adaptation. Start with the basics, understand how each component functions, and then gradually layer on more advanced integrations. The journey of automating your home is a rewarding one, leading to a living space that is intuitive, efficient, and perfectly tailored to your lifestyle, built with your own hands.
| Key Takeaway | Brief Description |
|---|---|
| 💡 Smart Plugs | Simple, cost-effective entry to automate any appliance. |
| ✨ Smart Lighting | Enhance ambiance and save energy with customizable lights. |
| 🌡️ Smart Thermostats | Optimize climate control, learn habits, and reduce energy bills. |
| 🔒 Smart Security | Gain peace of mind with remote monitoring and intelligent alerts. |
Frequently Asked Questions About DIY Smart Home Projects
For beginners, smart plugs and smart light bulbs are often considered the easiest entry points. They require minimal installation—just plugging them into an outlet or screwing them into a socket—and offer immediate, tangible automation benefits. These projects help familiarize users with smart home apps and basic scheduling without complex wiring.
While some devices, particularly those that connect directly via Wi-Fi, do not require a separate hub for basic functionality, a smart home hub can significantly enhance your experience. Hubs allow devices from different manufacturers to communicate, enable more complex automations, and can improve overall system responsiveness and reliability. It’s recommended as you expand your smart home.
The savings vary widely depending on your current energy consumption habits and the specific smart devices you install. Smart thermostats and smart lighting are often cited as the biggest energy savers. Households can typically expect to save between 10-25% on heating and cooling costs with a smart thermostat, and similar percentages on lighting by optimizing schedules and usage.
Security is a legitimate concern for any connected device. While no system is 100% hack-proof, reputable smart home device manufacturers employ robust encryption and security protocols. Users can further enhance security by using strong, unique passwords, enabling two-factor authentication, keeping device firmware updated, and using a secure Wi-Fi network.
Most of these projects require minimal technical skills. If you can follow instructions, use basic hand tools (like a screwdriver), and are comfortable with a smartphone app, you’re well-equipped. For projects involving electrical wiring (like smart switches or thermostats), basic electrical safety knowledge is crucial, and turning off the power at the breaker is paramount.
Conclusion
Embarking on DIY Smart Home Projects: 5 Easy Upgrades to Automate Your Home in a Weekend offers a rewarding path to enhancing your living space with increased convenience, security, and efficiency. From the simple practicality of smart plugs to the intelligent climate control of smart thermostats, each upgrade represents a step towards a more connected and responsive home. By taking a thoughtful, iterative approach, you can gradually build a smart ecosystem that reflects your needs and lifestyle, proving that transforming your home into an automated haven is within reach for anyone willing to explore the possibilities.


