Master Personalized Stickers with Your Cricut Machine
Anúncios
Creating personalized stickers with a Cricut machine is a streamlined process that transforms digital designs into tangible, custom adhesive art, offering endless possibilities for unique decorations, branding, or gifts through precise cutting and user-friendly software.
Are you ready to dive into the exciting world of custom crafting? Learning How to Make Personalized Stickers with a Cricut Machine opens up a universe of creative possibilities, from unique decorations to branding essentials. This guide will walk you through every step, ensuring you transform your ideas into tangible, vibrant stickers with ease and precision.
Understanding Your Cricut Machine and Materials
Before you embark on your sticker-making journey, it’s crucial to familiarize yourself with your Cricut machine and the various materials involved. A Cricut machine, whether it’s a Maker, Explore Air, or Joy, is essentially a computer-controlled cutting device that can cut a vast array of materials with incredible precision. For sticker making, its “Print Then Cut” feature is particularly revolutionary, allowing you to print your designs on a home printer and then accurately cut them using the Cricut.
Choosing the right materials is paramount for successful sticker creation. The market offers a wide variety of sticker papers, each with unique properties. Vinyl sticker paper is a popular choice due to its durability and water resistance, making it ideal for items that might encounter moisture, like water bottles or car decals. Photo sticker paper, on the other hand, provides excellent color reproduction, perfect for intricate designs or photographic images.
Types of Sticker Paper for Cricut
- Vinyl Sticker Paper: Known for its robust nature and water resistance. It comes in various finishes like matte, glossy, and clear. Ideal for outdoor applications or items needing frequent cleaning.
- Printable Vinyl: Specifically designed for printing with inkjet printers and then cutting with your Cricut. Offers good durability and vibrant colors.
- Glossy Sticker Paper: Provides a professional, shiny finish that makes colors pop. Great for decorative stickers and product labeling.
- Matte Sticker Paper: Offers a non-reflective surface, giving a more subtle and elegant look. Easier to write on if needed.
Beyond the paper itself, consider the adhesives. Some sticker papers come with permanent adhesive, ensuring your stickers stay put for a long time, while others have removable adhesive for temporary applications. Understanding these nuances will help you select the best material for your specific project, ensuring your personalized stickers meet your expectations for appearance and longevity.
Finally, don’t forget accessories like weeding tools, which are essential for removing excess vinyl from your intricate designs, and transfer tape, crucial for applying vinyl stickers cleanly. Having all your materials ready and understanding their functions will streamline your workflow and yield professional-looking results every time.
Designing Your Personalized Stickers in Cricut Design Space
Cricut Design Space is the heart of your sticker-making process. It’s the free software that allows you to design, edit, and send your creations to your Cricut machine. Mastering this platform is key to unlocking your full creative potential and ensuring your personalized stickers turn out exactly as envisioned.
The first step is to open Design Space and start a new project. You have several avenues for creating your designs. You can upload your own images, whether they are photos, illustrations, or logos. Design Space supports various file formats, including .jpg, .png, .svg, and .bmp. When uploading, you’ll specify whether your image is simple, moderately complex, or complex, which helps the software process it for cutting. For intricate designs, a .png with a transparent background is often ideal as it minimizes the need for background removal.
Alternatively, you can utilize the vast library of images, fonts, and ready-to-make projects available within Design Space. Many of these are free, while others are part of the Cricut Access subscription, which offers an expansive collection of assets. You can combine shapes, text, and graphics to create unique compositions. Experiment with different elements to see what resonates with your vision.
Key Design Space Features for Stickers
- Print Then Cut: This is the most vital feature for sticker making. It allows you to print designs on your home printer and then use your Cricut to cut around them accurately. Ensure your designs are set to “Print Then Cut” in the Layers panel before proceeding.
- Offset Tool: This incredibly useful tool creates an outline or shadow layer around your design, perfect for making borders on your stickers. You can adjust the distance of the offset and choose a different color for it, adding depth and a professional finish.
- Flatten Tool: Essential for “Print Then Cut” projects. The Flatten tool combines multiple layers into a single printable image while maintaining the cut lines of the outermost shape. Without flattening, Design Space would attempt to cut each individual layer.
- Attach Tool: Different from Flatten, Attach holds cut lines in place relative to each other. Use this when you want multiple elements to be cut out together without becoming one printable image.
When working with text, Design Space offers a wide array of fonts. You can also use system fonts installed on your computer. Experiment with different fonts, sizes, and spacing to achieve the desired look. For multi-colored text or intricate designs, remember to flatten all relevant layers before sending to print, preventing the machine from cutting out individual letters or shapes instead of the unified sticker outline.
Always preview your design before printing and cutting. The “Make It” screen will show you exactly how your design will be laid out on the mat. This is your last chance to catch any errors or make minor adjustments to placement and size, ensuring your personalized stickers come to life perfectly.
Preparing Your Design for Print Then Cut
The “Print Then Cut” feature is what truly distinguishes Cricut machines for sticker making, allowing for intricately cut, full-color designs. Preparing your design correctly in Design Space is a critical step to ensure precision and prevent common issues. This involves several checks and adjustments before sending your project to your printer and then to your Cricut machine.
First, always confirm that your design is set to “Print Then Cut.” In Design Space, select all the layers of your design that you want to be part of the sticker and click the “Flatten” tool. This action merges all selected layers into a single flattened image for printing, while preserving the outermost cut line. If you skip this step, your Cricut will attempt to cut each individual layer or element, resulting in an unusable mess.
Next, pay close attention to the size of your design. Cricut’s “Print Then Cut” feature has a maximum printable area. For most machines, this is approximately 6.75 inches by 9.25 inches. If your design exceeds these dimensions, Design Space will prompt you with an error message. You’ll need to resize your image to fit within these constraints. Batching multiple smaller stickers onto one canvas within these limits is an efficient way to maximize your material usage.
Optimizing for Print Quality
- Resolution: Ensure your uploaded images have a high resolution (at least 300 DPI) for crisp, clear prints. Low-resolution images will appear pixelated.
- Color Profile: While Design Space doesn’t offer extensive color management, be aware that colors on your screen might look slightly different when printed, especially if you’re using a consumer-grade printer.
- Printer Settings: When sending your design to your home printer, always choose the highest print quality settings. Select “Photo” or “Best” quality and ensure you’re using the correct paper type setting (e.g., “Photo Paper” or “Glossy Paper”) to optimize ink distribution.
Before printing, turn off the “Add Bleed” option in Design Space if you want a precise cut right to the edge of your design. “Bleed” extends the print slightly beyond the cut line to prevent a white border if the cut is slightly off. While useful for general “Print Then Cut” projects, some users prefer turning it off for stickers to achieve a cleaner look, especially if the design has a defined border.
Once you’ve printed your design, do not touch the registration marks that Cricut Design Space automatically adds around your design. These black rectangular outlines are crucial for your Cricut machine. The machine’s sensor will scan these marks to accurately position its blade for cutting. Smudges or obstructions on these marks will lead to cutting errors.
Finally, ensure your sticker paper is loaded correctly into your printer. Some papers have a specific print side. Double-check this to avoid wasted material. Proper preparation at this stage saves a lot of frustration and ensures your personalized stickers are vibrant, well-defined, and perfectly cut.
Printing Your Custom Sticker Designs
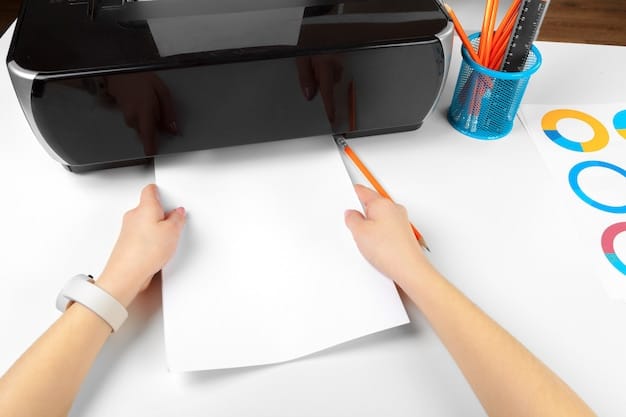
With your design perfectly prepared in Cricut Design Space, the next crucial step is printing your custom sticker designs using your home printer. While the Cricut machine handles the cutting, the quality of your print directly impacts the final appearance of your personalized stickers. This stage requires attention to detail regarding both your printer’s capabilities and the type of sticker paper you’re using.
Once you click “Make It” in Design Space and proceed through the final preparation steps, you’ll be prompted to send your design to a printer. Here, you’ll have a few important options. Always ensure “Add Bleed” is selected if you want to avoid unwanted white edges around your cut design, or deselect it for a precise edge, understanding the potential for slight white borders if alignment is not perfect. Critically, remember to enable “Use System Dialog” for your printer. This option allows you to access your printer’s specific settings, which are vital for achieving the best print quality.
Accessing your system print dialog opens up a world of control over your print job. Within this dialog, navigate to the “Preferences” or “Printing Properties” section. Here, you should select the highest print quality available, often labeled as “Photo” or “Best.” Additionally, choose the correct paper type that matches your sticker paper, such as “Glossy Photo Paper,” “Matte Photo Paper,” or “Specialty Paper.” This tells your printer what type of material it’s printing on, allowing it to optimize ink saturation and drying times, leading to more vibrant colors and sharper details.
Tips for Flawless Printing
- Clean Your Printer Heads: If your prints look streaky or faded, perform a print head cleaning cycle from your printer’s utility software before printing your stickers.
- Use Quality Ink: While branded ink can be expensive, it generally provides better color accuracy and longevity. Third-party inks can sometimes clog print heads or produce inconsistent results.
- Load Paper Correctly: Ensure your sticker paper is loaded into the printer with the correct side facing up (or down, depending on your printer model) for printing. Most sticker papers are designed to be printed on one specific side.
- Test Print: If you’re using a new type of sticker paper or a particularly intricate design, consider doing a small test print on a regular piece of paper first to ensure everything is aligned and sized correctly.
After printing, allow your sticker sheets to dry thoroughly before handling. Inkjet inks, especially on glossy or specialty papers, can smudge easily if touched prematurely. Drying times vary depending on the ink, paper type, and humidity, but generally, 10-15 minutes should suffice for most inkjet prints. Avoid stacking printed sheets immediately after printing, as the ink can transfer.
When you’re dealing with multiple sticker sheets, ensure you keep them organized and free from dust or debris. Any particles on the surface can interfere with the Cricut’s sensor reading the registration marks, leading to misaligned cuts. By meticulously handling the printing stage, you set the foundation for expertly crafted, personalized stickers that truly stand out.
Cutting Your Personalized Stickers with Cricut
Once your personalized sticker designs are printed and properly dried, the next exciting phase is cutting them with your Cricut machine. This is where the magic happens, as your printed sheets are transformed into individual, perfectly shaped stickers. Precision is key here, and understanding how your Cricut interacts with the material is crucial for flawless results.
First, carefully place your printed sticker sheet onto a Cricut cutting mat. The mat should be clean and have appropriate stickiness for your material. For most sticker papers, a LightGrip (blue) or StandardGrip (green) mat will work well. Align the top left corner of your printed sheet with the corner of the mat, ensuring it’s smooth and free of air bubbles or wrinkles. Any unevenness can affect the cut accuracy.
Next, load the mat into your Cricut machine. Ensure it’s pushed firmly against the rollers before pressing the load/unload button. In Cricut Design Space, select your material setting. This is a critical step, as different sticker papers require different pressures. Cricut offers predefined settings for “Printable Sticker Paper,” “Printable Vinyl,” “Washi Sheet,” and more. Start with the recommended setting for your specific material. If you find the cut isn’t deep enough, you can try the “More Pressure” option. If it cuts too deep, affecting the backing, try “Less Pressure.”
Pre-Cut Checklist for Cricut
- Clean Mat: Ensure your cutting mat is clean and sticky enough to hold the paper securely.
- Clean Blade: Check your blade for any debris and ensure it’s properly seated in the housing. A dull or dirty blade can lead to ragged cuts.
- Adequate Lighting: For the Cricut’s sensor to read the registration marks, ensure your machine is in a well-lit area. Shadows or poor lighting can interfere with the scan.
- Correct Material Setting: Double-check that you’ve selected the appropriate setting for your specific sticker paper in Design Space.
Once the settings are confirmed, click the “Go” or “Start” button in Design Space, and then press the flashing “C” button on your Cricut machine. The machine will first perform a scan, using its optical sensor to read the black registration marks printed around your design. This scan tells the machine exactly where your design is on the mat, allowing it to cut with incredible precision. It’s vital that these registration marks are clear and unobstructed.
After the scan, the cutting process begins. The machine will precisely cut around your sticker designs. It’s often mesmerizing to watch. Once the cutting is complete, do not unload the mat immediately. Instead, always perform a “test lift” of a small section of your design to see if the cut went through properly. If it didn’t, you can run the cut again without unloading the mat by pressing the “C” button again, provided you did not remove the mat from the machine.
Finally, carefully unload the mat and gently peel off your personalized stickers. If you’re cutting larger shapes, you might be able to simply peel them off the mat. For intricate details, carefully “weed” away the excess sticker paper around your designs using a weeding tool. You now have beautifully cut, personalized stickers ready for application or gifting.
Applying and Caring for Your Personalized Stickers
Once your personalized stickers are expertly cut, the final step is their application. Proper application ensures your stickers adhere smoothly and last longer, preserving your creative effort. The method of application can vary slightly depending on the type of sticker and its intended use, but some universal principles apply.
Before applying any sticker, ensure the surface is clean, dry, and free of dust, grease, or any residues. For surfaces like water bottles, laptops, or car windows, cleaning with rubbing alcohol and then drying thoroughly is highly recommended. A clean surface provides the best adhesion for your stickers, preventing air bubbles and premature peeling.
For simple shapes or individual stickers, you can often just peel off the backing and apply them directly. Start by peeling a small section of the backing and align the sticker. Then, slowly peel the rest of the backing away while simultaneously pressing the sticker down from the center outwards to smooth out any air bubbles. A credit card or a squeegee can be very useful here to press firmly and evenly across the surface of the sticker.
Advanced Application Techniques
- Using Transfer Tape: For intricate designs, multiple pieces, or layered vinyl stickers, transfer tape is indispensable. Apply transfer tape over your cut sticker design on the backing paper. Use a squeegee to firmly press the transfer tape onto the sticker. Then, slowly peel the backing paper away, ensuring the sticker adheres completely to the transfer tape. Position the sticker (still on the transfer tape) onto your desired surface, press down firmly, then slowly peel off the transfer tape, leaving only your design behind.
- Wet Application Method: For very large vinyl decals, a wet application can help reposition the sticker before it fully adheres. Mix a few drops of dish soap with water in a spray bottle. Spray the application surface lightly, apply the sticker, then squeegee out the water and bubbles. This method requires more drying time but provides excellent control.
- Layering Stickers: If your design involves multiple layers of vinyl, apply the bottom layer first, then carefully align and apply subsequent layers on top.
Caring for your personalized stickers after application will determine their longevity. For water-resistant vinyl stickers on tumblers or water bottles, hand-washing is generally recommended over dishwashing, as the high heat and harsh detergents of dishwashers can degrade the adhesive over time. Avoid abrasive cleaners or scrubbing directly on the sticker.
For stickers on laptops or notebooks, occasional wiping with a damp cloth should suffice. If your stickers are on outdoor surfaces, like car windows, they are designed to withstand weather elements, but extreme temperatures and direct, prolonged sun exposure can eventually cause fading or cracking. By taking these simple steps, your personalized stickers will look fantastic and remain vibrant for a considerable time, showcasing your unique style and craftsmanship.
Maximizing Your Personalized Sticker Projects
Producing personalized stickers with a Cricut machine is not just about the technical steps; it’s also about optimizing your workflow, exploring advanced techniques, and thinking creatively to get the most out of your projects. By adopting smart practices, you can enhance the quality of your stickers, save materials, and broaden your creative horizons significantly.
One of the best ways to maximize your sticker projects is to become proficient in nesting your designs. Nesting refers to arranging multiple sticker designs on your mat in the most efficient way possible to minimize wasted space. Cricut Design Space does have an optimization feature, but sometimes manual arrangement or using third-party nesting tools can save even more material, especially when working with various sizes and shapes of stickers. This is particularly valuable for large batches or when using expensive specialty papers.
Layering is another powerful technique. While “Print Then Cut” creates a single, consolidated image, you can combine this with regular vinyl cuts to add special effects. For instance, print a detailed image, then cut a metallic or holographic vinyl layer to place on top, creating a unique shimmer effect. Alternatively, cut a solid color vinyl as a base layer, then print and cut a more intricate design to apply on top for added depth and durability.
Advanced Sticker Project Ideas
- Die-Cut Stickers: Beyond simple contours, explore complex die-cut shapes that follow the intricate lines of your design without a border.
- Kiss-Cut Sticker Sheets: Create sheets where individual stickers can be peeled off while the backing remains intact. This is ideal for selling sticker packs. You achieve this by setting a lighter pressure on your cut settings so that it cuts through the sticker paper but not the backing.
- Sticker Bombs: Design a collection of coordinated smaller stickers to be applied together to fill a surface, creating a cohesive visual impact.
- Glow-in-the-Dark or Reflective Stickers: Experiment with specialty printable materials to create stickers with unique properties for safety or novelty.
For enhanced durability, especially for stickers destined for outdoor use or high-touch surfaces, consider laminating your printed stickers. After printing and before cutting, apply a clear self-adhesive laminate sheet over your printed design. This layer protects the ink from UV fading, scratches, and water damage. Ensure the laminate covers the entire printed area, including the registration marks, but be aware that some laminates might affect how the Cricut sensor reads these marks. Test a small piece first.
Finally, don’t be afraid to experiment with different types of printable materials. Beyond standard vinyl, explore printable heat transfer vinyl for fabric stickers, printable temporary tattoo paper, or even printable magnetic sheets for custom fridge magnets. Each material opens up new avenues for personalized projects, allowing you to continually expand your crafting skills and the range of unique items you can create with your Cricut machine.
Troubleshooting Common Sticker Making Issues
Even with meticulous planning, you might encounter issues when making personalized stickers with your Cricut machine. Knowing how to troubleshoot common problems can save you time, material, and frustration, helping you achieve perfect results every time. Most issues are related to either the printing, cutting, or software settings.
One of the most frequent problems is misaligned cuts, where the Cricut doesn’t cut precisely around your printed design. This is almost always due to the registration marks. Ensure your printed sheet is placed straight in the top-left corner of the cutting mat. The mat itself should be clean and sticky, preventing the paper from shifting. Poor lighting can also interfere with the sensor’s ability to read the marks; try illuminating your machine’s cutting area. If using glossy sticker paper or laminate, sometimes the reflection can confuse the sensor; try placing matte tape over the registration marks (ensuring the marks themselves are visible through the tape) or use a dimmer light. If the marks are smudged or incomplete, the machine won’t be able to read them at all, so reprinting is necessary.
Another common issue is rough or incomplete cuts. This often points to a dull or dirty blade. Remove your blade from its housing and check for any debris (like tiny pieces of sticker paper) stuck to it. Use a ball of aluminum foil to “sharpen” the blade by repeatedly piercing it into the foil; this can often dislodge tiny particles and slightly refine the edge. If the problem persists, it’s likely time to replace your blade. Also, ensure you have selected the correct material setting in Design Space, and if the cut is not deep enough, try the “More Pressure” option until it cuts through cleanly without cutting into the backing.
Resolving Print Then Cut Glitches
- Design Space Bugs: Occasionally, Design Space itself might have a temporary glitch. Try saving your project, closing the software, restarting your computer, and then reopening Design Space.
- Printer Connection: Ensure your printer is correctly connected and selected in your system’s printer dialog. Sometimes a simple re-connection can resolve print errors.
- Software Updates: Always ensure both your Cricut Design Space software and your machine’s firmware are up to date. Outdated software can lead to compatibility issues and unexpected errors.
- Paper Jam Prevention: Avoid overfilling your printer tray. Load sticker paper one sheet at a time if you’re experiencing frequent jams.
If your prints are coming out faded or with incorrect colors, the problem lies with your home printer. Check your ink levels and clean your printer heads as described in the printing section. Ensure you’re selecting the highest print quality in your system printer dialog and the correct paper type. Sometimes, designs saved in different color profiles (like CMYK vs. RGB) can display differently on screen versus print; generally, Design Space works with RGB, so ensure your original files are optimized for that.
Finally, if your machine is struggling to pick up the registration marks at all, ensure there are no obstructions beneath the scanner arm, such as stray pieces of paper or mat adhesive. Clear your machine’s path and try again. By systematically eliminating potential causes, you’ll troubleshoot most issues efficiently and get back to creating stunning personalized stickers.
| Key Aspect | Brief Description |
|---|---|
| 🖨️ Design Space Setup | Flatten all layers for Print Then Cut; ensure design fits 6.75×9.25 inch max print area. |
| ✨ Print Quality | Use high-resolution images & access system print dialog for “Best” quality and correct paper type settings. |
| ✂️ Cricut Cutting | Clean mat & blade. Set correct material, ensure clear registration marks for accurate cuts. |
| 💧 Application & Care | Clean surface before applying. Use transfer tape for intricate designs. Hand-wash for longevity. |
Frequently Asked Questions About Cricut Sticker Making
You can use any inkjet printer for Cricut’s Print Then Cut feature. It doesn’t need to be a special photo printer, but one capable of higher resolution and quality settings for photo paper will yield better results. Laser printers are not recommended for printable vinyl or sticker papers as their toner can crack or peel.
Inaccurate cuts are primarily due to issues with registration marks. Ensure they are clear, clean, and not smudged. Ensure your mat is clean and sticky, and the paper is placed perfectly straight. Lighting conditions around your machine can also affect the sensor’s ability to read the marks properly, so ensure good, even light.
Yes, you can make reasonably waterproof stickers. Use printable vinyl designed for water resistance, and consider applying a clear laminate sheet over your printed design before cutting. This provides an extra layer of protection against water, UV rays, and scratches, enhancing durability for items like water bottles or outdoor use.
Print Then Cut involves printing a full-color design on your home printer first, then having the Cricut cut around that printed image. Regular vinyl cutting involves the Cricut cutting simple shapes or text directly from a roll or sheet of solid-colored vinyl, without prior printing. Both techniques are useful for different types of projects.
To prevent peeling, always apply stickers to a clean, dry surface. Use high-quality sticker paper with strong adhesive. For added durability, especially for frequently handled items, consider laminating your stickers after printing but before cutting, and avoid harsh cleaning agents or dishwashers if the stickers are on washable items.
Conclusion
Creating personalized stickers with your Cricut machine is a rewarding endeavor that blends digital design with tangible craft. From understanding the nuances of different materials to mastering the intricacies of Design Space’s Print Then Cut feature, each step contributes to the satisfaction of seeing your unique visions come to life. By adhering to best practices in design preparation, printing, and cutting, and by knowing how to troubleshoot common issues, you can consistently produce high-quality, professional-looking stickers. This skill not only empowers you to customize your world but also opens doors to a myriad of creative projects, making every surface a canvas for your personal touch.
