How to Build a Birdhouse from Scrap Wood: A DIY Guide
Anúncios
Building a birdhouse from scrap wood is a rewarding and sustainable DIY project that provides shelter for local birds while repurposing materials, making it an ideal activity for those seeking an eco-friendly hobby.
Embarking on a DIY project can be incredibly satisfying, especially when it involves giving new life to old materials. Learning how to build a birdhouse from scrap wood offers not only an outlet for creativity but also a tangible way to support local wildlife. This guide will walk you through the essential steps, from selecting the right materials to adding the finishing touches, ensuring your feathered friends have a safe and welcoming new home.
Why Build a Birdhouse from Scrap Wood?
Building a birdhouse from scrap wood is more than just a craft; it’s a statement of sustainability and a testament to resourcefulness. Many people overlook the hidden potential in discarded lumber, treating it as waste rather than a valuable building material. By choosing to build a birdhouse using these remnants, you’re actively participating in the circular economy, reducing landfill waste, and giving these materials a second, purposeful life. This approach not only saves money on buying new wood but also contributes to a healthier planet by minimizing the demand for new timber production, which can have significant environmental impacts such as deforestation and habitat destruction. It’s a simple yet powerful way to make a positive impact on your local ecosystem.
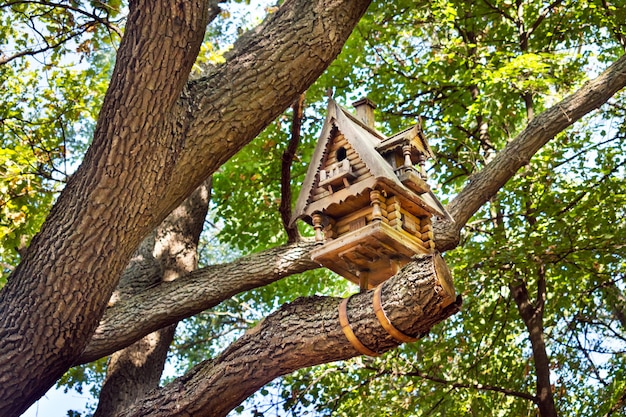
Beyond the environmental benefits, there’s a unique charm that comes with a birdhouse constructed from various types of scrap wood. Each piece tells a story, contributing to a unique aesthetic that mass-produced birdhouses simply cannot replicate. The different grains, colors, and textures of repurposed wood can create a visually appealing structure that blends seamlessly with the natural environment while standing out as a piece of functional art. This inherent uniqueness adds character and an artisanal touch, reflecting the effort and creativity invested in its creation. It becomes a conversation starter, showcasing your commitment to sustainability and your DIY prowess.
Furthermore, building a birdhouse from scratch, especially with salvaged materials, offers a profound sense of accomplishment. It’s a project that can be tailored to your skill level, whether you’re a beginner looking for a simple, straightforward design or an experienced crafter seeking a more intricate challenge. The process involves problem-solving, measuring, cutting, and assembling, all of which contribute to skill development. It’s an opportunity to learn about different types of wood, their properties, and how they interact. The satisfaction of seeing your creation provide shelter for a nesting pair of birds is unparalleled, a tangible reward for your efforts. It connects you more deeply with nature, encouraging observation and appreciation for the small miracles happening in your backyard.
Environmental Impact of Repurposing
Using scrap wood significantly reduces waste, a critical step towards environmental conservation. Every piece of wood diverted from a landfill lessens the burden on waste management systems and cuts down on greenhouse gas emissions associated with decomposition.
* Reduces landfill waste and pollution
* Decreases demand for virgin timber
* Lowers carbon footprint
* Promotes resourcefulness and sustainability
The act of repurposing extends the lifecycle of materials, transforming them from potential pollutants into valuable assets. This directly supports eco-friendly practices within your own home and community.
In addition, utilizing existing materials often means you are working with wood that has already been treated or aged, potentially giving it certain desirable characteristics such as increased durability or a weathered look that is sought after for rustic aesthetics. This can save time and effort on artificial aging processes, making the project more straightforward and enjoyable. The environmental ripple effect of one small project can inspire others to consider similar sustainable practices in their own lives.
The beauty of working with scrap wood also lies in its accessibility. Many people have old fence boards, pallet wood, or leftover construction materials lying around that are perfect for this project. Instead of spending money on new supplies, you can often find what you need for free or at a very low cost, making it an economical choice for a rewarding hobby. This affordability opens up DIY, allowing more individuals to engage in creative and practical projects without significant financial investment.
Gathering Your Materials and Tools
Before you begin constructing your birdhouse, a crucial step is to meticulously gather all the necessary materials and tools. This preparatory phase is vital for a smooth and efficient building process, preventing frustrating interruptions and ensuring you have everything at hand when inspiration strikes. The beauty of this project lies in its flexibility; you don’t need expensive, specialized equipment. Often, standard household tools and simple woodworking essentials will suffice. Think about what types of scrap wood you have available, as this will influence your design choices. Old fence pickets, pallet wood, leftover decking, or even sturdy pieces of plywood from a previous project are excellent candidates. Ensure they are free from rot, excessive nails, or chemical treatments that could harm birds.
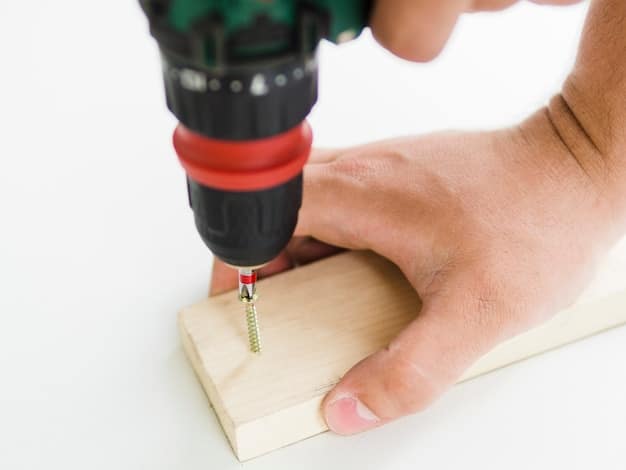
Once you have a general idea of your wood supply, you can start listing out the specific tools needed. A good hand saw or a miter saw will be indispensable for making precise cuts. For securing the pieces, consider options like waterproof wood glue, small nails, or screws—often, a combination works best for maximum durability. A drill will be necessary for creating pilot holes and attaching screws, and if you opt for nails, a hammer is essential. Don’t forget measuring tape or a ruler for accuracy, a pencil for marking cuts, and safety gear like gloves and eye protection. Having these items laid out and ready will streamline your workflow and allow you to focus on the craftsmanship.
This project also offers an excellent opportunity to explore different types of wood and learn about their specific properties. Hardwoods like oak or maple scrap pieces might offer greater longevity and resistance to the elements, while softer woods like pine or fir are easier to work with. The variety of colors and textures from mixed scrap wood can also contribute to the aesthetic appeal of your finished birdhouse. Consider the thickness of your wood; thicker pieces will provide better insulation and structural integrity, crucial for the comfort and safety of the birds.
Essential Tools for Birdhouse Construction
Having the right tools makes all the difference in the ease and safety of your construction project. While some flexibility exists based on your resources, certain items are universally recommended.
* Measuring Tape/Ruler: For accurate dimensions.
* Pencil: For marking cuts and drilling spots.
* Saw (Hand or Power): To cut wood to size. A miter saw offers precision.
* Drill: For pilot holes and screws, if used.
* Hammer: For nails.
* Safety Glasses and Gloves: To protect your eyes and hands.
* Clamps: To hold pieces steady during gluing or fastening.
Choosing the Right Scrap Wood
Not all scrap wood is suitable for a birdhouse. You’ll want pieces that are durable, free of excessive rot, and ideally, untreated or treated with bird-safe materials. Look for wood that is at least 1/2 inch thick for good insulation and structural stability. Pallet wood, salvaged fencing, or even old shelving units can be excellent sources. Avoid pressure-treated wood as its chemicals can be harmful to birds. Ensure the wood is dry; wet wood can warp and split as it dries, compromising the birdhouse’s integrity. The diversity of wood types adds character to the final product but prioritize functionality.
Different types of wood provide varying levels of insulation and durability. Pine and cedar are common choices due to their natural resistance to rot and insects, but even a mix of fir and spruce can work well if properly sealed. Thicker wood offers better temperature regulation, which is vital for nesting birds as it helps keep their eggs and young warm during cooler periods and cool during warmer periods. Always inspect your scrap wood for any signs of mold or mildew, as these can also be detrimental to bird health. Cleaning and preparing the wood properly before assembly is a small but critical step that prolongs the life of the birdhouse and ensures the well-being of its inhabitants.
Designing Your Birdhouse: Key Considerations
The design phase is where your creativity comes into play, but it’s also where practical considerations are paramount to ensure your birdhouse is functional and safe for its inhabitants. When designing, think about the specific types of birds you wish to attract. Different species have preferences for entrance hole sizes, internal dimensions, and even the orientation of the house. For instance, wrens prefer smaller, cozier spaces, while bluebirds need a slightly larger interior with a precisely sized entrance hole to deter larger, more aggressive birds. Researching local bird species and their nesting requirements will significantly increase the chances of your birdhouse being adopted. This forethought ensures that your efforts aren’t just aesthetically pleasing but also biologically sound.
Beyond bird-specific needs, consider the structural integrity and durability of your design. The birdhouse needs to withstand various weather conditions—rain, wind, sun, and even snow, depending on your climate. Features like a sloped roof are essential for shedding water, preventing moisture accumulation that can lead to rot and mold. Adequate ventilation, usually achieved through small holes near the top, is crucial for preventing overheating during hot summer months, protecting young nestlings. A removable bottom or side panel is a highly recommended feature for easy cleaning, allowing you to maintain a hygienic environment for future occupants. Without proper cleaning, old nests can harbor parasites and diseases, posing a risk to new bird families.
Finally, think about safety features. A perch might seem like a thoughtful addition, but for many smaller birds, it can act as an easy foothold for predators like squirrels or larger birds. Often, a smooth, unperched entrance hole is safer. Additionally, ensure there are no sharp edges or exposed nails inside the birdhouse that could injure the birds. The interior should be smooth and free of splinters. The overall aesthetic should also blend into its natural surroundings, providing a sense of camouflage and security for the nesting birds. A well-designed birdhouse isn’t just a structure; it’s a sanctuary.
Bird-Specific Requirements
Tailor your design to attract specific birds. Different species have unique needs.
* Entrance Hole Size: Crucial for attracting specific birds and deterring predators.
* Interior Dimensions: Varies by species for comfortable nesting.
* Ventilation: Small holes near the roof for air circulation.
* Drainage: Small holes in the floor to prevent water accumulation.
* No Perches: Often better to deter predators.
Structural Integrity and Durability
A robust birdhouse lasts longer and provides better protection. Consider features that enhance its lifespan and functionality.
* Sloped Roof: Essential for water runoff, preventing rot.
* Weatherproof Adhesives/Sealants: Protect against moisture.
* Sturdy Joinery: Secure connections using screws or strong nails.
* Removable Bottom/Side: Facilitates easy cleaning, crucial for hygiene.
Think about the longevity of the materials chosen. While scrap wood is sustainable, some types might last longer than others in outdoor conditions. Consider adding a protective finish that is non-toxic to birds, such as linseed oil or a water-based sealant, to extend the life of the wood and enhance its resistance to moisture and UV damage. This small extra step can significantly impact the birdhouse’s durability and ensure it remains a safe haven for many seasons. The placement of the birdhouse also plays a role in its longevity; positioning it in a shaded area can reduce sun exposure and prevent the wood from drying out too quickly and cracking.
Cutting and Preparing Your Wood Pieces
With your design finalized and materials gathered, the next critical step is to accurately cut and prepare your scrap wood pieces. Precision at this stage is paramount, as even slight inaccuracies can lead to gaps or misalignments that compromise the structural integrity and weatherproofing of your birdhouse. Start by carefully measuring each dimension according to your design plan. Use a pencil to mark your cutting lines clearly, ensuring they are straight and square. For repetitive cuts, like the side panels or roof pieces, consider making a template to ensure uniformity. This helps in maintaining consistency and makes the assembly process much smoother.
When cutting, always prioritize safety. Wear appropriate personal protective equipment, including safety glasses to protect against flying debris and gloves for a better grip and to prevent splinters. If using power tools, familiarise yourself with their operation and always follow manufacturer guidelines. Take your time with each cut, allowing the saw to do the work rather than forcing it, which can lead to crooked cuts or kickbacks. After cutting, inspect each piece for rough edges or splinters. Sanding these down with sandpaper or a sanding block will not only provide a cleaner finish but also prevent injury to both yourself and the birds that will inhabit the house.
For the entrance hole, measure its placement precisely. The height from the floor of the birdhouse to the center of the entrance hole is a critical factor for many species, as it impacts nesting behavior and predator avoidance. Use a drill with an appropriate-sized hole saw bit to create a clean, circular opening. If you don’t have a hole saw, you can carefully drill a series of small holes along the perimeter of the marked circle and then use a jigsaw to connect them, tidying up the edges with a file or sandpaper. Remember, a clean entrance hole is important for the birds’ safety and comfort.
Measuring and Marking
Accurate measurements are the foundation of a well-built birdhouse. Double-check all dimensions before cutting.
* Use a reliable measuring tape or ruler.
* Mark clear cut lines with a pencil.
* Consider templates for repeatable pieces.
Cutting with Precision
Safe and precise cutting ensures a snug fit and a durable structure.
* Wear safety glasses and gloves.
* Use a sharp saw appropriate for your wood thickness.
* Cut along marked lines slowly and steadily.
* For holes, use a drill with the correct bit or hole saw.
Sanding and Finishing Prep
Smooth edges and surfaces are crucial for safety and aesthetics.
* Sand all cut edges to remove splinters.
* Lightly sand all surfaces if you plan to apply a finish.
* Ensure the interior is smooth to protect birds.
This stage of preparation is often underestimated but plays a significant role in the overall quality of the final birdhouse. Taking the time to properly measure, cut, and sand your individual pieces will not only make the assembly much easier but will also result in a sturdier, more attractive, and bird-friendly dwelling. Think of it as laying the groundwork for a successful and satisfying project. A well-prepped piece of wood is a joy to work with and ensures that the subsequent steps can be executed with maximum efficiency.
Assembling Your Birdhouse
With all your pieces meticulously cut and prepared, the assembly phase brings your birdhouse design to life. This process requires careful alignment and secure fastening to ensure the structure is robust enough to withstand the elements and provide a safe shelter for birds. Begin by dry-fitting all the components together without glue or fasteners. This crucial step allows you to identify any misalignments or pieces that need slight adjustments before permanent attachment, saving you time and frustration later on. Once you are satisfied with the fit, you can proceed with fastening.
Start with the base and side panels. Apply a thin, even layer of waterproof wood glue to the edges that will join. Wood glue provides excellent bonding strength and helps create a tight seal against moisture. Then, align the panels and secure them with small, weather-resistant nails or screws. For screws, always drill pilot holes first to prevent the wood from splitting, especially when working with thinner or brittle scrap wood. The choice between nails and screws often comes down to personal preference and the type of wood you’re using; screws generally offer a stronger hold but are more visible.
Once the main box structure is in place, attach the roof. The roof should be slightly overhanging on all sides to provide adequate protection from rain and sun. Again, use waterproof wood glue along the edges where the roof meets the side panels, and then secure it with nails or screws. If your design includes a removable bottom or side for cleaning, ensure that the fasteners for this component allow for easy detachment and reattachment. Hinges or simple latches can be used here. Finally, inspect all connections to ensure they are solid and that no sharp points of fasteners protrude into the interior, which could harm birds.
Step-by-Step Assembly Guide
Follow these steps for a sturdy and well-constructed birdhouse.
* Dry Fit: Assemble all pieces without glue or fasteners to check fit.
* Base and Sides: Apply waterproof wood glue to edges, then nail or screw together.
* Entrance Panel: Secure the front panel with the pre-drilled bird entry hole.
* Roof Attachment: Fasten the sloped roof, ensuring overhang for protection.
* Ventilation/Drainage: Drill small holes if not already accounted for in design.
* Cleaning Access: Install hinges or latches for removable panels.
Fastening Techniques and Tips
Proper fastening is key to durability.
* Adhesive: Use exterior-grade waterproof wood glue for strong, weather-resistant bonds.
* Nails: Small, galvanized or stainless steel nails (1.5-2 inches) work well for thinner wood.
* Screws: Stainless steel or exterior screws (1.5-2 inches) provide superior holding power. Always pre-drill pilot holes to prevent splitting.
* Clamps: Use clamps to hold pieces firmly in place while glue dries or during fastening.
Ensuring all joints are tight and sealed is crucial for keeping the interior dry and safe from drafts. A bead of exterior-grade caulk around the seams, particularly where the roof meets the walls, can further enhance weather resistance. This added layer of protection ensures that even during heavy rains, the inside of the birdhouse remains dry and comfortable for its future inhabitants. Take your time during the assembly process; rushing can lead to errors that compromise the birdhouse’s integrity. The goal is to create a secure and welcoming home that will last for many seasons.
Finishing Touches and Placement
Once your birdhouse is fully assembled, the finishing touches can make a significant difference in its longevity, appearance, and suitability for birds. While adding a decorative flair can be tempting, prioritize the safety and well-being of the future inhabitants. If you choose to paint or stain the birdhouse, use only non-toxic, exterior-grade paints or stains. Water-based options are generally safer, and it’s recommended to paint only the exterior, leaving the interior natural. This prevents birds from ingesting harmful chemicals or lingering fumes. Allow plenty of time for any finishes to dry completely and off-gas before placement, usually several days in a well-ventilated area. A natural, weathered look often blends best with the environment and is generally preferred by birds.
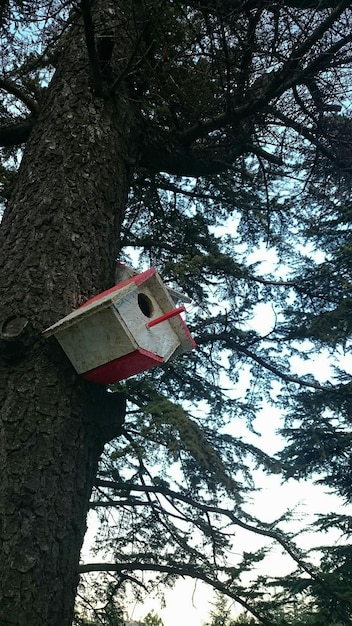
After the birdhouse is dry, the final step is strategic placement. The location of your birdhouse can greatly impact its attractiveness to birds and its long-term success. Choose a spot that offers some protection from prevailing winds, direct scorching sun, and potential predators. A common recommendation is to mount the birdhouse on a pole with a guard to deter squirrels, raccoons, and cats, rather than directly on a tree branch. Trees provide easy access for climbing predators. The ideal height typically ranges from 5 to 15 feet off the ground, depending on the bird species you aim to attract. Ensure the entrance hole faces away from the direction of strong winds and rain, usually towards the north or east, to provide maximum shelter.
Consider the surrounding environment as well. Birds appreciate a clear flight path to the entrance hole, so avoid placing the birdhouse in dense foliage that could obstruct access or hide predators. Proximity to water sources, like a bird bath, or native plants that offer food and additional cover can also significantly increase the chances of adoption. Regular monitoring of the birdhouse, especially during nesting season, can provide valuable insights into its usage and help you identify any necessary adjustments. The careful consideration of these finishing touches and placement strategies ensures your upcycled birdhouse becomes a beloved sanctuary for local wildlife.
Non-Toxic Finishes
If you choose to finish your birdhouse, opt for products safe for wildlife.
* Exterior-Grade, Water-Based Paint: Only on the exterior.
* Non-Toxic Stains/Sealants: Like natural linseed oil or beeswax.
* Allow Full Curing: Ensure all fumes dissipate before placement.
* Natural Wood: Often best, as birds are not deterred by unfinished wood.
Optimal Placement for Birdhouses
Location is critical for attracting birds and ensuring their safety.
* Height: 5-15 feet off the ground, varying by species.
* Predator Guard: Essential if mounting on a pole or post.
* Direction: Entrance hole facing away from prevailing winds (north/east usually ideal).
* Clear Flight Path: Ensure unobstructed access to the entrance.
* Proximity to Resources: Near water, native plants, or protective cover.
Remember, patience is key. It might take some time for birds to discover and adopt your new birdhouse. Continual observation and minor adjustments to placement or surrounding habitat can increase the likelihood of success. Building a birdhouse is an ongoing relationship with nature, providing both shelter for wildlife and continuous enjoyment for you. This commitment to thoughtful design and placement will ensure your scrap wood creation serves its purpose effectively and beautifully for years to come, contributing to the local ecosystem with minimal environmental impact.
Maintenance and Monitoring Your Birdhouse
Once your birdhouse is built, finished, and strategically placed, the journey doesn’t end there. Ongoing maintenance and monitoring are crucial to ensure it remains a safe, healthy, and inviting habitat for birds season after season. Regular inspection allows you to identify and address any issues early, such as damage from weather or predators, or nests from unwanted species like wasps or house sparrows, which can be aggressive towards native birds. A well-maintained birdhouse is more likely to be used successfully by nesting pairs and can contribute significantly to local bird populations. Neglecting maintenance can turn a potential home into a hazardous environment, harboring parasites or diseases that harm birds.
The most critical aspect of birdhouse maintenance is annual cleaning. After the nesting season is over, typically in late fall or early winter, it’s time to thoroughly clean out the old nest. This is why a removable side or bottom panel is so highly recommended in the design phase. Wearing gloves, remove all nesting materials and any debris. Scrub the interior with a solution of 9 parts water to 1 part bleach or a mild, non-toxic soap. Rinse thoroughly with clean water and allow the birdhouse to air dry completely before reassembling and preparing it for the next nesting season. This process removes parasites, mites, and any fecal matter that could be detrimental to future occupants. Without proper cleaning, new birds are less likely to use the house.
Monitoring extends beyond just cleaning. Observe the birdhouse periodically during nesting season for signs of activity. If native birds are using it, try to maintain a respectful distance to avoid disturbing them. If you notice signs of pests or aggressive non-native birds, you might need to take action, such as adding a predator guard, adjusting the entrance hole size with an appropriately sized guard, or temporarily blocking the entrance if non-native species are persistent. Education about local bird species and their nesting habits will equip you to be a responsible steward of your birdhouse and the wildlife it supports. Consistent care ensures your upcycled creation truly serves its purpose as a sustainable sanctuary.
Annual Cleaning Schedule
Cleaning your birdhouse annually is vital for bird health and future nesting success.
* Timing: Late fall or early winter, after nesting season.
* Method: Remove old nest, scrub with a diluted bleach solution (1:9 bleach to water) or mild, non-toxic soap.
* Rinsing: Rinse thoroughly with clean water to remove all cleaning agents.
* Drying: Allow to air dry completely before reassembling.
* Tools: Wear gloves; use a stiff brush for scrubbing.
Dealing with Pests and Unwanted Occupants
Sometimes, unwanted guests might try to move into your birdhouse.
* House Sparrows/Starlings: Aggressive non-native species; remove nests promptly.
* Wasps/Bees: Remove nests carefully when inactive, or relocate if beneficial.
* Predators: Ensure predator guards are effective against squirrels and cats.
* Monitoring: Regular observation helps catch issues early.
This proactive approach to maintenance not only extends the life of your birdhouse but also enhances its appeal to a wider variety of birds over time. A clean, well-maintained birdhouse signals a safe and healthy environment, making it a prime nesting location. It’s a small commitment that yields significant benefits, turning your backyard into a vibrant haven for native bird species, a beautiful example of how sustainable initiatives can directly benefit local biodiversity. The ongoing interaction with the wildlife further enriches the experience of having a birdhouse.
| Key Point | Brief Description |
|---|---|
| ♻️ Sustainability | Utilizes scrap wood, reducing waste and promoting eco-friendly habits. |
| 🛠️ Material Sourcing | Gather untreated, durable wood; ensuring safety and longevity. |
| 📐 Design & Fit | Tailor design for bird species, feature proper ventilation and drainage. |
| 🧹 Maintenance | Annual cleaning and monitoring are essential for bird health and house longevity. |
Frequently Asked Questions About Birdhouses
The best types of scrap wood are durable, untreated ones like cedar, cypress, pine, or exterior-grade plywood. Avoid pressure-treated wood as its chemicals can be harmful to birds. Ensure the wood is free from rot, mold, or excessive nails that could injure occupants. Thicker pieces, around 1/2 to 3/4 inch, offer better insulation and structural stability.
Extremely important. The entrance hole size dictates which bird species will use the birdhouse and helps deter larger predators or unwanted aggressive birds like house sparrows. For example, wrens prefer a 1-inch diameter hole, while bluebirds need 1 1/2 inches. Research the specific birds you want to attract and match the hole size accordingly for best results.
It is generally recommended not to include a perch. While it might seem inviting, a perch can provide a foothold for predators like squirrels, raccoons, and larger birds, making it easier for them to access the nesting cavity and harm the birds or their eggs. Smaller birds do not require a perch to enter their nests.
Birdhouses should be cleaned at least once a year, ideally in late fall or early winter after the nesting season has concluded. This removes old nesting materials, parasites, and debris, ensuring a healthy and welcoming environment for new birds in the spring. A removable bottom or side makes this process much easier for thorough cleaning and drying.
Choose a location that offers protection from strong winds and direct sun, ideally facing north or east. Mount it on a pole with a predator guard rather than a tree to deter climbing animals. The height should be appropriate for the target bird species, generally 5 to 15 feet off the ground. Ensure a clear flight path to the entrance hole.
Conclusion
Building a birdhouse from scrap wood is a truly fulfilling project that harmonizes sustainability, creativity, and ecological stewardship. By repurposing materials that might otherwise end up in landfills, you not only reduce waste but also craft a unique, durable sanctuary for local birds. The process, from meticulous material selection and precise cutting to thoughtful assembly and strategic placement, underscores the importance of attention to detail and a commitment to wildlife welfare. Regular maintenance solidifies your role as a responsible environmentalist, ensuring your birdhouse remains a safe and valuable asset for feathered friends year after year.


