Build a DIY Bookshelf from Reclaimed Wood for Under $75
Anúncios
A step-by-step guide to constructing a functional and aesthetically pleasing DIY bookshelf using reclaimed wood, highlighting cost-effective strategies to complete the project for under $75, emphasizing sustainable practices, and creative design.
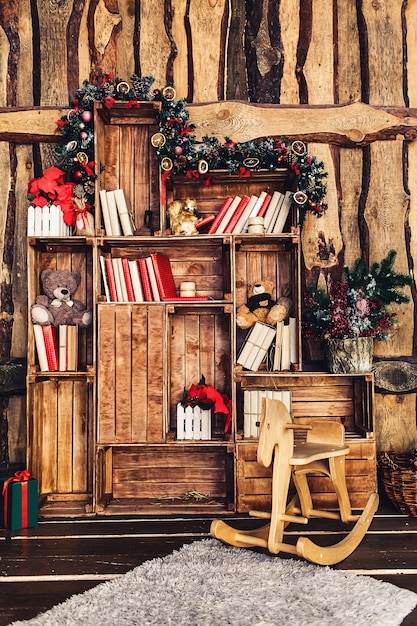
Are you looking for an affordable and unique way to organize your growing book collection? Learning how to build a DIY bookshelf from reclaimed wood for under $75 offers a sustainable and creative solution that not only tackles clutter but also adds character to your home. This guide will walk you through the entire process, from sourcing materials to the final touches, ensuring your project is both budget-friendly and beautiful.
Why Reclaimed Wood is Your Best Bet for an Affordable Bookshelf
Opting for reclaimed wood instead of new lumber is a strategic choice for several reasons, particularly when aiming for a budget under $75. This material offers a unique aesthetic that new wood simply cannot replicate, carrying a rich history and distinct character. Every piece tells a story, often displaying natural wear, original nail holes, and a patina developed over years, sometimes even decades or centuries.
The beauty of reclaimed wood is multifaceted. It’s an eco-friendly option, as you’re repurposing materials that might otherwise end up in landfills, thus reducing demand for new logging and conserving forest resources. This sustainable approach aligns with a growing desire for environmentally conscious living. Moreover, its inherent strength and stability are often superior to modern, fast-grown timber, meaning your bookshelf will likely be more durable.
Finding Your Treasure: Where to Source Reclaimed Wood
The quest for affordable reclaimed wood is an adventure in itself. Success often hinges on knowing where to look and being patient. Think outside the box and consider unconventional sources that might yield fantastic finds for little to no cost.
- Demolition Sites: Often, old barns, houses, or industrial buildings being torn down are treasure troves of high-quality wood. Always ask for permission before taking anything, and prioritize safety.
- Local Sawmills and Lumberyards: Some specialized yards deal exclusively in reclaimed wood, offering a range of options often at a fraction of the price of new, specialty wood.
- Online Marketplaces: Websites like Craigslist, Facebook Marketplace, and local free sections can list free or low-cost wood from individuals looking to clear out their properties.
- Pallets: While often smaller, repurposing sturdy pallets can provide free wood. Ensure they are free from chemical treatments (look for “HT” stamps for heat-treated, meaning safer).
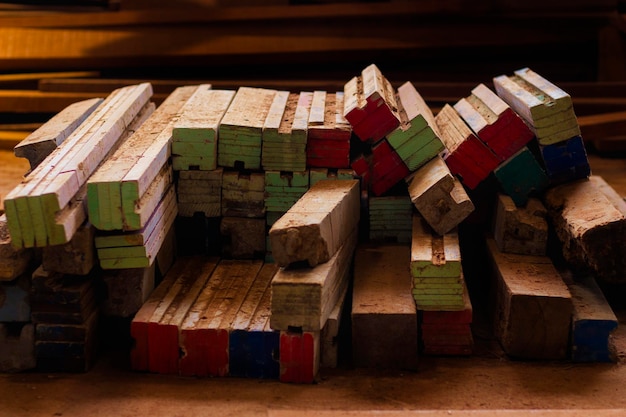
When scouting for wood, assess its condition carefully. Look for pieces that are relatively straight and free from severe rot or excessive warping. Minor imperfections, knots, and nail holes add to the charm and authenticity of reclaimed wood, so don’t shy away from pieces with character. The goal is to find wood that is structurally sound enough for a bookshelf, allowing for a creative, rustic look without compromising stability.
Considering the “under $75” budget, your best strategy is to prioritize free or very low-cost sources. Lumberyards and specialized dealers might have better quality control, but online listings and demolition sites are often where the real bargains are found. Be prepared to clean, de-nail, and possibly plane or sand the wood yourself, as these preparatory steps are crucial for transforming raw finds into usable materials for your project.
Essential Tools and Materials: Budget-Friendly Preparations
Before you start cutting and assembling, having the right tools and materials is crucial for a smooth build. The good news is, for a simple DIY bookshelf, you don’t need a professional workshop full of expensive equipment. By borrowing, renting, or repurposing, you can significantly keep your costs down, ensuring you stay well within your $75 budget.
For your reclaimed wood project, the most important materials beyond the wood itself include fasteners, wood glue, and a protective finish. Opting for screws provides stronger joints than nails for a bookshelf that will bear significant weight. Wood glue adds an extra layer of stability, bonding surfaces together. A simple, inexpensive clear coat or stain can protect the wood and enhance its natural beauty without breaking the bank.
Your DIY Tool Kit: What You’ll Need
Building a bookshelf from reclaimed wood requires a basic set of tools. If you don’t own these, consider borrowing from friends, family, or even a local community tool library. This is a common strategy employed by savvy DIYers to minimize upfront expenses.
- Measuring Tape: Essential for accurate dimensions and cuts.
- Pencil: For marking cut lines and screw placements.
- Speed Square or Combination Square: To ensure all your cuts are perfectly square.
- Hand Saw or Circular Saw: A hand saw is adequate for basic cuts; a circular saw offers more speed and precision for larger pieces.
- Drill/Driver: To pre-drill holes and drive screws.
- Screwdriver Bits: Matching your chosen screws.
- Sanding paper or Electric Sander: To smooth rough edges and prepare wood for finishing.
- Clamps: Useful for holding pieces together while glue dries or during assembly.
Purchasing these tools new can quickly exceed your budget. Focus on acquiring only what’s necessary. For instance, if you anticipate only one or two straight cuts, a handsaw might suffice, eliminating the need for a circular saw. Used tools can also be found at flea markets or online at a significant discount.

In terms of fasteners, a box of wood screws (e.g., 2-inch or 2.5-inch depending on wood thickness) should be sufficient. When it comes to finishes, consider linseed oil, mineral oil, or a water-based polyurethane. These are generally less expensive than oil-based stains and highly effective at protecting the wood while allowing its character to shine through. With careful planning and strategic sourcing, your material and tool costs can easily remain under the $75 threshold.
Designing Your Rustic Bookshelf: Simple Plans for Maximum Charm
The design phase is where your vision truly begins to take shape. For a budget-friendly bookshelf from reclaimed wood, simplicity is key. Overly complex designs can increase material waste, require more advanced tools, and substantially inflate the time commitment. A rustic aesthetic naturally lends itself to straightforward designs that highlight the wood’s inherent beauty rather than intricate joinery.
Before drawing, consider the space where your bookshelf will reside. Measure the available height, width, and depth. This will inform the dimensions of your individual shelves and the overall structure. A common simple design involves two vertical side supports and several horizontal shelves. The number of shelves will depend on your desired storage capacity and the height of the unit.
Practical Design Considerations
Even with a simple plan, a few practical considerations can make a big difference in the stability and functionality of your bookshelf. Thinking through these details beforehand will save time and potential frustration during the build process.
- Shelf Spacing: Books come in various sizes. Consider leaving ample vertical clearance for larger books, or vary the spacing between shelves to accommodate different categories.
- Stability: For taller units, consider adding a back panel (even a thin piece of plywood or reclaimed pallet wood) or anchoring the bookshelf to the wall for anti-tip safety.
- Wood Dimensions: Your design should be adaptable to the dimensions of the reclaimed wood you’ve sourced. Don’t fight the wood; let its natural variations inform your cuts and construction.
- Legs or No Legs: Decide if you prefer the bookshelf to sit directly on the floor or have small legs. Legs can elevate the unit, making it easier to clean underneath and potentially adding to the aesthetic.
A basic sketch, even on a piece of scrap paper, is highly recommended. It doesn’t need to be an architectural drawing; just a clear representation of your desired dimensions and the number of shelves. This will help you calculate the total linear feet of wood needed and visualize the final product. Remember, the beauty of reclaimed wood is its imperfect nature. Embrace slight variations and irregularities as part of its charm. A rustic bookshelf thrives on character rather than factory-perfect precision.
By focusing on a straightforward design, you minimize the need for complex cuts or joinery, making the project accessible even for novice builders. This approach perfectly aligns with the goal of creating a beautiful, functional, and deeply personal piece of furniture on a very modest budget.
Preparing Your Reclaimed Wood: Cleaning, Cutting, and Sanding
Once you’ve gathered your reclaimed wood, the next critical step is preparing it for assembly. This involves several stages: cleaning, de-nailing, cutting to size, and sanding. Each step is vital for both the safety of your project and the final aesthetic. Proper preparation ensures durable construction and a beautiful finish that highlights the wood’s unique imperfections.
Reclaimed wood, by its nature, often comes with dirt, grime, and old hardware embedded in it. Skipping the cleaning and de-nailing steps can lead to splinters, broken saw blades, or uneven surfaces. Similarly, precise cutting ensures your bookshelf will be stable and level, while thorough sanding prepares the wood for a smooth, protective finish.
Step-by-Step Preparation
Taking your time with preparation will pay dividends in the long run. Rush this stage, and you risk a less-than-satisfactory end product or even damage to your tools. Start with the most basic but essential tasks.
- Cleaning: Begin by scrubbing the wood with a stiff bristle brush to remove loose dirt, cobwebs, and debris. For more stubborn grime, a mixture of water and a mild detergent can be used, followed by thorough rinsing. Ensure the wood is completely dry before proceeding to the next steps to prevent mold or warping.
- De-Nailing and Hardware Removal: Using a claw hammer, pry bar, or vice grips, carefully remove any nails, screws, staples, or metal remnants from the wood. Even small pieces of metal can damage saw blades and cause injury. Fill any resultant holes with wood filler if you desire a smoother finish, though many prefer to leave them for rustic appeal.
- Measuring and Cutting: Based on your design plan, measure and mark all your pieces accurately. Use your speed square to ensure all cuts are precisely 90 degrees. A hand saw is suitable for basic cuts, but a circular saw will provide cleaner, straighter cuts with less effort. Cut your vertical supports and all your shelf pieces to the determined lengths.
- Sanding: This step is crucial for both safety and aesthetics. Rough-sanding (with 80-120 grit sandpaper) will remove splinters and smooth out major imperfections. Follow up with finer grit sandpaper (180-220 grit) for a smoother finish, especially on surfaces that will be frequently touched. Pay extra attention to edges and corners.
For budget-conscious builders, remember that electric sanders can be rented or borrowed, or you can opt for manual sanding blocks. While more time-consuming, manual sanding is incredibly effective and cost-free beyond the sandpaper itself. The goal is to achieve a surface that is pleasant to the touch and ready to absorb a protective finish, without necessarily making it furniture-grade smooth unless that’s your aesthetic preference. Embrace the authenticity that reclaimed wood offers; minor nicks and variations are part of its charm.
Successfully preparing your reclaimed wood sets the foundation for a sturdy and visually appealing bookshelf. This thorough approach ensures your materials are safe to work with and ready to be transformed into a functional piece of furniture that will last for years.
Assembly and Construction: Bringing Your Bookshelf to Life
With your reclaimed wood properly prepared, the journey moves to assembly. This phase is where your design sketch transitions into a tangible piece of furniture. Building a sturdy bookshelf requires careful alignment, secure fastening, and a methodical approach, even for a simple design.
The core principle of bookshelf construction typically involves attaching horizontal shelves to vertical supports. For reclaimed wood, which may not be perfectly uniform, a slightly flexible approach is beneficial. Don’t aim for absolute perfection in every joint; instead, focus on overall stability and the inherent character of the materials.
Building Step-by-Step
A systematic approach ensures stability and alignment. Work on a flat, level surface to prevent wobbling or uneven assembly. Having a helper for a taller or larger unit can also make the process smoother and safer.
- Create the Sides: If your design involves multiple planks for the side supports, join them first using wood glue and screws. Ensure these vertical pieces are sturdy and aligned.
- Mark Shelf Locations: Carefully measure and mark the exact positions for each shelf on the interior side of your vertical supports. Use your speed square to ensure the marks are level across both supports. Consistency here is crucial for a level bookshelf.
- Pre-drill Holes: Before driving any screws, pre-drill pilot holes. This prevents the wood from splitting, especially important with older, drier reclaimed wood. Ensure the pilot holes are slightly smaller than the diameter of your screws. For strong joints, consider countersinking the screw heads for a flush finish.
- Attach Shelves: Start with the bottom shelf, as it provides a stable base. Apply a thin, even layer of wood glue to the edges of the shelf where it meets the vertical supports. Then, align the shelf with your marked lines and secure it with screws. Repeat this process for each subsequent shelf, working your way up.
- Check for Squareness: Periodically, as you add shelves, use your speed square or a large framing square to check that the entire structure remains square. Slight adjustments during assembly are much easier than trying to correct them later.
- Add Back Panel (Optional but Recommended): If you choose to add a back panel for extra stability and to prevent books from falling through, cut it to size and attach it to the back edges of your shelves and vertical supports using smaller screws or nails.
When attaching shelves, use clamps to hold the pieces firmly in place while you drill and drive screws. This helps maintain alignment and prevents movement. For added rigidity, especially if your reclaimed wood pieces are thinner, consider adding small L-brackets or corner braces to the undersides of the shelves where they meet the vertical supports. These are inexpensive but add significant strength.
Patience is a virtue during assembly. Double-check your measurements and alignments. The goal is a functional and stable bookshelf. Any minor imperfections in the wood or the assembly itself will only add to the unique character of your reclaimed piece, making it truly one-of-a-kind. With careful assembly, your bookshelf will not only hold your literary treasures but also serve as a proud testament to your DIY skills.
Finishing Touches: Protecting and Enhancing Your Bookshelf
Once your bookshelf is fully assembled, the final stage involves applying a protective finish. This step is not just about aesthetics; it’s crucial for protecting the wood from moisture, dust, and wear, ensuring your newly built piece lasts for years to come. The right finish can also significantly enhance the natural beauty and unique character of reclaimed wood.
The choice of finish depends on your desired look and the level of protection needed. For a rustic, budget-friendly project like this, simple and effective options are usually best. You want something that seals the wood without hiding its distinctive features, such as grain patterns, nail holes, or natural discoloration.
Choosing and Applying Your Finish
Before applying any finish, ensure the wood is completely clean and dry after assembly. Any dust or debris will be sealed in, creating an uneven or rough surface. Use a tack cloth or a slightly damp rag to wipe down all surfaces. For reclaimed wood, consider the “less is more” approach to finishing, letting the wood speak for itself.
- Oil Finishes (e.g., Linseed Oil, Tung Oil): These penetrate the wood, enhancing its natural color and grain while offering moderate protection. They provide a beautiful, natural-looking matte or satin finish. Apply with a clean cloth, allow to penetrate, then wipe off excess. Multiple coats may be needed for greater durability.
- Wax Finishes: Furniture wax provides a soft, warm luster and some protection. It’s easy to apply and reapply. It’s often used over oil finishes for added depth.
- Water-Based Polyurethane: For more durable protection, especially if the bookshelf will be in a high-traffic area, water-based polyurethane is a good choice. It dries quickly, cleans up with water, and doesn’t yellow over time. Apply thin, even coats with a brush or foam applicator, lightly sanding between coats for a smooth finish.
- Light Stain (Optional): If you want to subtly alter the wood’s color, consider a very light, transparent stain before applying a top coat. Choose one that complements the existing tones of the reclaimed wood. Remember, reclaimed wood often “takes” stain differently due to its varied porosity.
Regardless of the finish chosen, always test it on a scrap piece of your reclaimed wood first. This will give you an idea of how the wood will react and what the final color and sheen will look like. Apply finishes in a well-ventilated area, following the manufacturer’s instructions for application and drying times.
Once the finish is dry, your bookshelf is ready for its grand debut! Style it with your favorite books, plants, and decorative items to personalize the space. This final step not only enhances the bookshelf’s visual appeal but also provides the necessary protection, ensuring your hand-built, budget-friendly creation lasts for many years to come.
Decorating Your Reclaimed Wood Bookshelf: Style on a Budget
A bookshelf goes beyond mere storage; it’s an opportunity to express your personality and enhance your living space. Decorating your newly built reclaimed wood bookshelf doesn’t have to be expensive. In fact, its rustic charm often blends beautifully with everyday items and natural elements, creating an inviting and curated look without breaking the bank.
The natural character of reclaimed wood provides a wonderful backdrop for a variety of decorative styles. Whether your aesthetic is minimalist, bohemian, modern farmhouse, or eclectic, a few strategic decorating choices can elevate your bookshelf from functional to fabulous. The key is balance and thoughtful placement, allowing both your books and decorative items to breathe.
Tips for Affordable and Charming Decor
Creating a visually appealing bookshelf involves more than just stacking books. Think about varying heights, textures, and introducing personal touches. Here are some ideas for decorating while keeping your budget in mind:
- Book Styling: Don’t just line up books. Stack some horizontally, place others vertically. Consider organizing by color for an aesthetically pleasing look, or by theme. Rotate books seasonally to keep the display fresh.
- Natural Elements: Bring the outdoors in. Small potted plants (succulents are budget-friendly and low-maintenance), dried flowers, or even interesting stones collected from nature can add organic texture and life.
- Personal Mementos: Display photographs in inexpensive frames, small travel souvenirs, or sentimental trinkets. These personal items tell a story and make the space uniquely yours.
- Thrift Store Finds: Vintage ceramics, unique vases, old cameras, or small sculptures found at thrift stores or charity shops can add character for a fraction of the retail price. Always be on the lookout for interesting shapes and textures.
- Art and Prints: Lean small framed prints or postcards against the back of the shelves. You can find affordable art online or even print out high-resolution public domain images for free.
- Varying Heights: Create visual interest by varying the heights of your decorative objects. Use a small stack of books as a pedestal for a vase or a sculpture.
- Empty Space: Don’t feel the need to fill every inch. Negative space allows the eye to rest and highlights the items you choose to display. Clutter can overwhelm, especially with the already rich texture of reclaimed wood.
Remember that balance is key. Distribute color, weight, and light evenly across the shelves. Step back frequently to assess your arrangement and make adjustments. The beauty of decorating is that it’s an ongoing process—you can always rearrange, swap items, and experiment until you find an arrangement you love. Your reclaimed wood bookshelf is a versatile canvas, ready to showcase both your literary tastes and your creative flair, all while maintaining the budget-friendly spirit of your DIY project.
By thoughtfully styling your bookshelf with items you already own, natural elements, and carefully selected thrifted treasures, you complete the transformation of humble reclaimed wood into a truly captivating and functional piece of home decor. This final step solidifies the aesthetic value of your effort, concluding your project with a personalized touch that reflects your unique style without overspending.
| Key Aspect | Brief Description |
|---|---|
| 💰 Cost Efficiency | Achieving a bookshelf for under $75 by sourcing free/low-cost reclaimed wood and using basic tools. |
| 🌳 Sustainable Materials | Utilizing reclaimed wood reduces waste and environmental impact, adding unique character. |
| 🛠️ Simple Construction | Straightforward design and basic joinery make the project accessible for DIY beginners. |
| ✨ Unique Aesthetic | The natural imperfections and history of reclaimed wood create a one-of-a-kind, rustic appeal. |
Frequently Asked Questions About Reclaimed Wood Bookshelves
Yes, often reclaimed wood is stronger and more stable than new lumber because it typically comes from older, slow-growth trees and has already undergone cycles of expansion and contraction. Proper cleaning, inspection for rot, and using appropriate fasteners ensure its structural integrity for a bookshelf.
Excellent sources include construction or demolition sites (with permission), local classifieds like Craigslist or Facebook Marketplace, and even sturdy wooden pallets from businesses. Always check for proper heat treatment (HT stamp) on pallets to avoid chemical residues.
Thoroughly clean and inspect the wood for any signs of rot or insect infestation. For added protection, you can treat the wood with a borate solution, which is non-toxic yet effective against fungi and insects. Applying a protective finish like polyurethane also helps seal the wood.
No special tools are generally required beyond standard woodworking tools like saws, drills, and sanders. However, be prepared to remove old nails and potentially uneven surfaces, which might require a sturdy pry bar or a robust sanding setup. A general-purpose saw blade is usually sufficient.
Absolutely. The key is sourcing wood for free or very cheap, minimizing new material purchases, and utilizing tools you already own or can borrow. Focus on simple designs and functional rather than decorative hardware. Your budget primarily covers screws, glue, and a basic finish.
Conclusion
Building a DIY bookshelf from reclaimed wood for under $75 is more than just a cost-effective project; it’s an opportunity to create a unique, sustainable, and personalized piece of furniture for your home. By thoughtfully sourcing materials, planning your design, and meticulously preparing and assembling the wood, you can transform forgotten timber into a treasured item. This endeavor not only provides practical storage but also imbues your living space with character and a story, reflecting a mindful approach to both craftsmanship and sustainability.


