How to Create Custom Phone Cases with Resin Art That Lasts
Anúncios
Crafting a durable and personalized phone case with resin art involves selecting the right materials, meticulously preparing the case, and applying resin carefully to ensure vibrant, long-lasting designs that offer both aesthetic appeal and protection.
If you’re seeking a unique way to express your style while protecting your phone, then learning how to create a custom phone case with resin art that lasts is an exciting endeavor. This guide will walk you through the process, transforming an ordinary accessory into a personalized masterpiece that withstands daily use and retains its vibrant appeal.
Understanding Resin Art for Phone Cases
Resin art has surged in popularity, offering an incredible medium for creating durable, glossy, and visually stunning effects. When applied to phone cases, it provides a protective layer that not only enhances aesthetics but also shields your device from minor scratches and everyday wear. Understanding the properties of different resins is crucial for achieving professional and long-lasting results in your phone case projects.
The primary types of resin suitable for phone cases are epoxy resin and UV resin. Each has distinct characteristics that make them ideal for different steps or artistic expressions in your crafting journey. Making an informed choice at the outset can significantly impact the quality and durability of your finished product.
Epoxy Resin vs. UV Resin: A Closer Look
Choosing between epoxy and UV resin depends largely on your project’s scale, desired cure time, and the complexity of your design. Both offer unique advantages for phone case customization.
- Epoxy Resin: This is a two-part system consisting of a resin and a hardener. When mixed in precise ratios, a chemical reaction occurs that cures the mixture into a solid, durable plastic. Epoxy resin offers a longer working time, which is excellent for intricate designs requiring careful placement of elements like glitter, dried flowers, or pigments. Its strength and clarity make it highly resistant to yellowing and provide a very hard, protective finish.
- UV Resin: In contrast, UV resin cures rapidly under ultraviolet light (either from a UV lamp or direct sunlight). It’s a single-component system, making it incredibly convenient for small, quick projects or for adding individual layers. UV resin is ideal for detail work, securing small embellishments, or creating domed effects. However, it can be more expensive per volume and might not be as scratch-resistant as fully cured epoxy resin.
For phone cases, a combination of both can be highly effective. For instance, an initial layer of epoxy resin can create a robust base, while UV resin can be used for final decorative details or a quick topcoat. Always ensure you are working in a well-ventilated area, regardless of the resin type, and wear appropriate personal protective equipment.
Understanding these fundamental differences ensures you select the optimal resin for your specific design vision, leading to a durable and high-quality custom phone case. The longevity of your creation heavily relies on this initial material choice and proper application techniques.
Essential Materials and Tools for Resin Art Phone Cases
Before diving into the creative process, gathering all necessary materials and tools is paramount. Having everything at hand ensures a smooth workflow and prevents interruptions that could compromise your resin art. The quality of your materials directly influences the final look and durability of your custom phone case.
From the phone case itself to the various decorative elements and safety gear, each item plays a crucial role. Investing in good quality supplies often pays off in terms of a more professional finish and a longer-lasting product that truly stands out.
Gathering Your Supplies
A well-stocked workspace is the foundation of any successful resin art project. Here’s a comprehensive list of what you’ll need to create stunning resin art phone cases:
- Clear Phone Case: Opt for a clear, hard plastic or TPU (thermoplastic polyurethane) case. These provide a neutral canvas for your resin art and allow the design to shine through. Ensure it fits your specific phone model perfectly.
- Resin Kit: Choose a high-quality epoxy or UV resin kit suitable for crafting. If using epoxy, ensure it’s a “doming” or “casting” resin for a smooth, bubble-free finish. For UV resin, a dedicated UV lamp is essential.
- Mixing Cups and Stirring Sticks: Disposable plastic or silicone cups are best for mixing resin. Silicone cups are reusable and easy to clean once the resin cures. Wooden craft sticks or silicone stirrers work well for mixing.
- Measuring Tools: Precision is key with epoxy resin. Use digital scales or marked measuring cups to ensure accurate ratios.
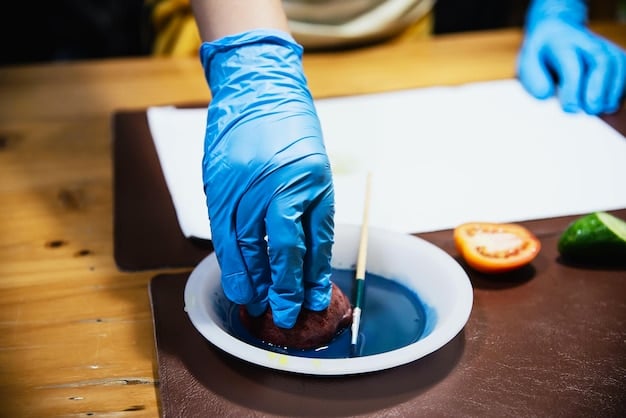
- Protective Gear: Always wear nitrile gloves to protect your hands from resin. A respirator mask is highly recommended for proper ventilation, especially when working with epoxy resin or in enclosed spaces. Safety glasses protect your eyes from splashes.
- Decorative Elements: The possibilities here are endless! Consider:
- Glitter and Mica Powders: For sparkle and color.
- Liquid Pigments/Dyes: To color the resin itself.
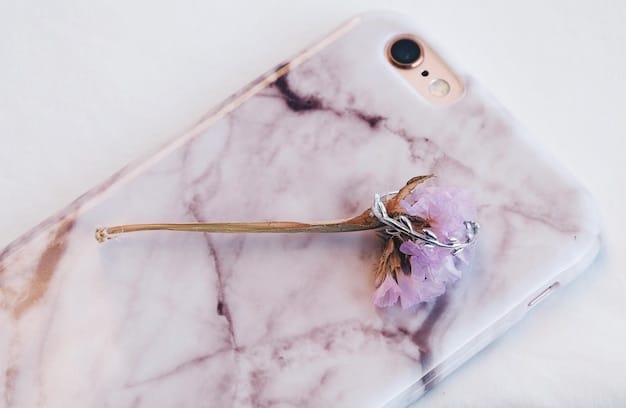
- Dried Flowers and Botanicals: Small, pressed flowers or leaves add a natural, elegant touch.
- Foils, Decals, and Stickers: Mylar flakes, gold leaf, and small adhesive decals can add intricate details.
- Charms and Miniatures: Tiny cabochons, flat-backed beads, or miniature figurines for unique three-dimensional effects.
- Heat Gun or Torch: A small heat gun or a butane torch is vital for removing air bubbles from the resin surface, ensuring a clear, glass-like finish.
- Parchment Paper or Silicone Mat: To protect your work surface from resin spills.
- Rubbing Alcohol or Acetone: For cleaning tools and accidental resin spills (while wet).
- Tweezers and Toothpicks: For precise placement of small embellishments and manipulating resin.
By having these materials organized and ready, you can approach your resin art project with confidence and focus entirely on the creative process, rather than scrambling for missing items. Proper preparation minimizes errors and enhances the overall safety of your crafting environment.
Preparing Your Phone Case and Workspace
Preparation is a critical step that often determines the success and longevity of your resin art phone case. A clean, stable, and well-organized workspace minimizes problems like dust particles, uneven surfaces, and poor resin adhesion. Skipping these crucial preparatory steps can lead to frustrating issues such as bubbles, cloudy finishes, or decorations shifting out of place.
Investing time in proper setup ensures an optimal environment for the resin to cure correctly, resulting in a beautiful and durable finished product. This stage sets the foundation for all your creative work to follow.
Ensuring a Perfect Foundation
Before you even think about mixing resin, meticulously prepare your phone case and your work area:
- Clean the Phone Case: Wash the clear phone case thoroughly with soap and water to remove any oils, dirt, or residues. Dry it completely with a lint-free cloth. You can also wipe it down with rubbing alcohol to ensure it’s spotless. Any dust or grease will show up as imperfections in your final resin layer.
- Level Your Workspace: Resin needs a perfectly level surface to cure evenly. Use a spirit level to check your table or workbench. If it’s not level, use shims underneath the legs to adjust it. An uneven surface will cause the resin to pool in one area, leading to an inconsistent thickness and appearance.
- Protect Your Surface: Lay down parchment paper, a silicone mat, or a plastic sheet to protect your work area from resin spills. Resin is notoriously difficult to clean once cured, so prevention is key.
- Prepare Your Embellishments: Arrange all your decorative elements (glitter, dried flowers, decals, etc.) within easy reach. If using dried flowers, ensure they are thoroughly dry, as any moisture can cause bubbling or discoloration under the resin.
- Control the Environment: Work in a dust-free environment as much as possible. Turn off fans and close windows if it’s windy, as airborne particles can settle in your wet resin. Maintain a stable room temperature as recommended by your resin manufacturer (usually around 70-75°F or 20-24°C), as extreme temperatures can affect cure time and resin viscosity.
Once your case is pristine and your workspace is perfectly set up, you’re ready to proceed to the exciting part: mixing and applying the resin. This careful preparation phase saves time and prevents potential headaches down the line, ensuring your artistic efforts yield the best possible outcome.
Mixing and Applying the Resin
The success of your resin art phone case hinges significantly on accurate resin mixing and careful application. Errors in this stage can lead to sticky spots, cloudy finishes, or a lack of durability. Precision and patience are your best allies here, ensuring the resin cures properly and creates a beautiful, resilient surface.
The Art of Resin Application
Follow these steps for optimal results, whether you’re using epoxy or UV resin:
- Accurate Measuring: For epoxy resin, precisely measure the resin and hardener according to the manufacturer’s instructions. Even a slight deviation can prevent proper curing. Using a digital scale is often more accurate than volume measurements.
- Thorough Mixing: Mix slowly and thoroughly for 3-5 minutes, scraping the sides and bottom of your mixing cup. Poor mixing is the leading cause of sticky resin. Avoid whipping, which introduces excessive air bubbles.
- Adding Color and Embellishments to Resin: If you want to color your resin, add liquid pigments or mica powders to the mixed resin. Start with a tiny amount and add more until you achieve the desired hue. Incorporate glitter or fine particles directly into the resin mixture for an even distribution.
- Applying the First Layer: Place your clean, prepared phone case on your level, protected surface. Carefully pour a small amount of mixed resin onto the back of the case. Use a stirring stick, toothpick, or silicone spreader to gently guide the resin to cover the entire surface evenly, ensuring it reaches all edges without overflowing significantly.
- Placing Embellishments on the Case: For larger or specific embellishments like dried flowers, place them directly onto the phone case itself before pouring the resin, or gently embed them into the still-wet first layer of resin using tweezers. Arrange them as desired.
- Removing Bubbles: After applying the resin, immediately use a heat gun or butane torch (held a few inches above the surface) to gently sweep across the resin. This pops any surface bubbles. Be quick and consistent, avoiding overheating, as this can scorch the resin or cause more bubbles. For UV resin, simply expose it to UV light.
- Curing the First Layer: Allow the first layer of epoxy resin to cure partially (to a tacky stage, usually 4-8 hours depending on the product) before adding subsequent layers, or fully cure if you’re creating a standalone design. UV resin cures in minutes under a UV lamp.
This meticulous approach ensures that your resin layers are strong, clear, and perfectly encapsulate your artistic vision. Proper application not only looks beautiful but also provides the necessary durability to protect your phone case for a long time.
Adding Details and Layering Techniques
Once your initial resin layer is set, the real artistry begins with adding details and creating depth through layering. This stage allows for significant creative freedom, enabling you to build complex designs, embed various textures, and achieve a truly custom look that captivates. Layering is key to ensuring that every element is perfectly encapsulated and protected, contributing to the overall durability and visual appeal of your phone case.
Whether you’re aiming for a subtle shimmer or a vibrant, multi-dimensional scene, thoughtful layering elevates your resin art from good to extraordinary. It also helps in securing delicate elements that might otherwise shift or protrude.
Building Depth and Design
Mastering layering techniques is essential for creating professional-looking resin art phone cases:
- Sequential Embellishment: Instead of adding all embellishments at once, consider applying them in stages. For instance, embed larger items in the first resin layer, allow it to tack up, then add smaller glitters or foils on top before pouring the next layer. This prevents items from sinking too much or migrating.
- Creating Depth with Multiple Layers: For a truly three-dimensional effect, apply thin layers of resin, allowing each to partially cure before adding more elements and another layer of resin. This creates an illusion of depth and allows elements to appear suspended within the resin.
- Adding Surface Details: Once a layer is fully cured, you can add more delicate surface details using UV resin. This is perfect for fine lines, small decals, or specific glitter placements that you want to stand out on the immediate surface. Cure these details immediately with a UV lamp.
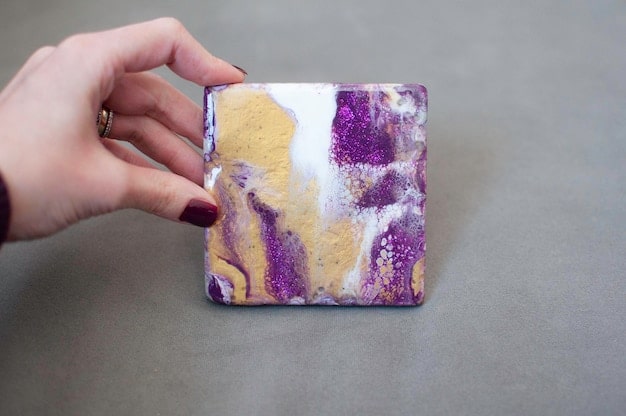
- Domed Effect: For a smooth, rounded edge and a highly glossy finish, apply a final, slightly thicker “doming” layer of resin, gently coaxing it to the edges. This creates a lens-like effect that magnifies the design beneath and provides excellent protection.
- Edge Finishing: Pay special attention to the edges of your case. Use a toothpick or silicone tool to ensure the resin covers the edges completely and evenly, preventing sharp points or weak spots that could chip over time.
These layering techniques not only enhance the aesthetic appeal of your resin art but also significantly contribute to the case’s longevity. By carefully building up your design and ensuring proper curing between layers, you create a robust seal that protects your phone case art from daily wear and tear, ensuring its lasting beauty.
Curing and Finishing Touches for Durability
The curing process is arguably the most critical stage in creating a truly long-lasting resin art phone case. Proper curing ensures the resin reaches its maximum hardness, clarity, and durability, protecting your art from scratches, yellowing, and impact. Rushing this stage, or not adhering to the manufacturer’s guidelines, will compromise the integrity and lifespan of your finished product.
Beyond curing, a few finishing touches can elevate the case’s appearance and reinforce its resistance to daily elements. These final steps are what transform a beautiful piece of art into a functional and enduring accessory.
Ensuring Longevity and Shine
- Full Cure Time for Epoxy Resin: While epoxy resin may be touch-dry in 12-24 hours, it typically takes 3-7 days to reach a full, hard cure. During this period, handle the case minimally and keep it in a dust-free, temperature-controlled environment. Avoid exposing it to extreme temperatures or direct sunlight until fully cured. Manufacturers’ guidelines on cure times are essential; always check them.
- UV Resin Curing: UV resin cures much faster. Place your case under a strong UV lamp for the recommended time (usually 60-120 seconds, depending on the lamp and resin brand). Ensure all areas are exposed to the UV light. Some UV resins might require a second pass or a longer cure time for thicker layers. For both types of resin, insufficient curing leads to a sticky surface or a soft, easily scratched finish.
- Eliminating Tackiness (Epoxy Only): If your epoxy resin feels slightly tacky after the initial cure time, it might be due to cooler temperatures or inaccurate mixing. Placing it in a slightly warmer environment or under a UV light for a short period can sometimes help, though prevention through proper mixing and temperature control is best.
- Buffing and Polishing: Once fully cured, your resin case should have a high-gloss finish. If there are any minor imperfections like small bumps or dull spots, you can gently sand them with very fine-grit wet/dry sandpaper (e.g., 2000-grit) and then buff with a resin polishing compound or a plastic polish. This step can restore shine and smooth out minor flaws, although it requires careful technique to avoid scratching.
- Final Inspection: Before declaring your case complete, inspect it under good lighting. Check for any missed spots, bubbles, or sharp edges. If necessary, apply a thin, final topcoat of resin and cure it.
By meticulously following these curing and finishing steps, you ensure that your custom resin art phone case is not only visually stunning but also remarkably durable, capable of withstanding the rigors of daily use and protecting your device for an extended period.
Maintaining Your Resin Art Phone Case
Once you’ve poured your heart into creating a beautiful, custom resin art phone case, the next step is ensuring its longevity through proper care and maintenance. While resin is durable, it’s not indestructible. Understanding how to clean and protect your case will keep it looking vibrant and new for as long as possible, preserving the intricate details and glossy finish you worked so hard to achieve.
Tips for Lasting Beauty
Here are essential tips to help your resin art phone case endure daily wear and maintain its aesthetic appeal:
- Regular Cleaning: Gently wipe your phone case with a soft, lint-free cloth, like a microfiber towel, to remove dust, fingerprints, and smudges. For tougher grime, dampen the cloth with a small amount of mild soap and water. Avoid abrasive cleaners, harsh chemicals (like acetone or ammonia-based products), or rough scrubbing pads, as these can dull the resin’s surface or scratch it.
Avoid Extreme Temperatures: While cured resin is sturdy, prolonged exposure to extreme heat (like leaving it on a car dashboard in direct sunlight or near a heating vent) can cause it to soften, warp, or yellow over time. Similarly, extreme cold can make it more brittle, though less common for phone cases.- Protect from Direct Sunlight: Even UV-resistant resins can eventually yellow or degrade under continuous direct sunlight exposure. If possible, avoid prolonged exposure, especially for cases with light colors or clear resin, which show yellowing more readily.
- Prevent Scratches: Although resin is scratch-resistant, it’s not scratch-proof. Avoid placing your phone case in direct contact with sharp objects like keys, coins, or rough surfaces in your bag or pocket. Consider using a separate pouch for your phone if you frequently carry it with other items.
- Handle with Care: While resin adds a protective layer, significant impacts can still crack the resin or the case underneath. Treat your custom case as the delicate art piece it is, avoiding unnecessary drops or forceful impacts.
- Re-apply a Top Coat (Optional): If your case starts to show significant wear or dullness after a long period, you can lightly sand the surface with very fine-grit sandpaper (2000+ grit, wet sanding) and apply a fresh, thin coat of clear resin. This can revitalize the shine and further protect the underlying art.
By following these simple maintenance practices, you can significantly extend the life and beauty of your custom resin art phone case. It ensures your artistic creation remains a vibrant and cherished accessory for years to come, reflecting your unique style wherever you go.
Troubleshooting Common Resin Art Issues
Even with careful preparation, issues can arise when working with resin. Common problems like bubbles, tackiness, or wavy surfaces can be frustrating, but most have identifiable causes and solutions. Knowing how to troubleshoot these issues is crucial for achieving a professional finish and for continually improving your resin art skills.
Understanding the root cause of an imperfection allows you to correct it in future projects, leading to consistently high-quality results and reducing wasted materials. Don’t be discouraged by initial setbacks; they are part of the learning curve.
Solving Resin Woes
Here are some of the most common resin art problems and how to address them:
- Bubbles:
- Cause: Mixing too fast, working in a cold environment, or not using a heat gun/torch properly.
- Solution: Mix slowly and deliberately. Warm your resin bottles slightly before mixing (e.g., in a warm water bath). Use a heat gun or torch to gently sweep over the surface after pouring. For deep bubbles, a pressure pot is ideal, but not practical for phone cases. Poke individual stubborn bubbles with a toothpick.
- Tacky/Sticky Resin:
- Cause: Inaccurate measuring of resin and hardener, insufficient mixing, or too cold a curing environment.
- Solution: Always measure precisely. Mix thoroughly for the recommended time, scraping sides and bottom. Ensure the room temperature is within the manufacturer’s specified range. If already tacky, you may try placing it in a warmer area or applying a thin, properly mixed top coat.
- Wavy/Uneven Surface:
- Cause: Uneven work surface, resin pulled away from edges, or over-torching.
- Solution: Always ensure your work surface is perfectly level. Use a toothpick or silicone tool to guide resin to all edges. Be quick and gentle with the heat gun/torch; prolonged heat can cause surface tension issues.
- Yellowing:
- Cause: Exposure to UV light (especially sunlight) over time, or using a non-UV-resistant resin.
- Solution: Use resin formulated with UV inhibitors if possible. Store finished cases away from direct, prolonged sunlight. Note that all resins can eventually yellow over a very long time, but UV-resistant ones slow the process.
- Dust/Fuzz in Resin:
- Cause: Working in a dusty environment, not covering the curing piece.
- Solution: Clean your workspace thoroughly. Turn off fans. Cover your freshly poured and curing resin with a dome or box to prevent airborne particles from settling. Remove surface dust with tweezers or a toothpick before the resin gels.
Learning from these common issues will significantly improve your skills in resin art. Each problem encountered is an opportunity to refine your technique, leading to higher quality and more consistently beautiful results in your custom phone case creations.
| Key Aspect | Brief Description |
|---|---|
| 🧪 Resin Choice | Epoxy for durability & work time; UV for quick details & small layers. |
| 🛠️ Preparation | Clean case & level, dust-free workspace are vital for a flawless finish. |
| ✨ Application | Accurate mixing, slow pouring, and bubble removal ensure a clear, strong layer. |
| 🔍 Durability | Full curing time and proper handling maintain shine and protect the art. |
Frequently Asked Questions About Resin Art Phone Cases
Epoxy resin is generally recommended for its superior durability, scratch resistance, and clear finish, making it ideal for the main body of the phone case. UV resin is excellent for quick, small details or thin topcoats due to its rapid curing under UV light. Often, a combination of both is used for optimal results.
With proper care and high-quality resin, a custom resin art phone case can last for several years. Factors influencing longevity include the initial curing process, exposure to extreme temperatures or direct sunlight, and how regularly the case encounters abrasive surfaces. Regular cleaning and mindful handling extend its life.
It’s best to use clear, hard plastic or TPU (thermoplastic polyurethane) phone cases. These materials adhere well to resin and create a neutral backdrop for your design. Avoid soft silicone cases as resin may not bond effectively or can peel off. Ensure the case is clean and dry before starting your project.
To minimize bubbles, mix resin slowly and thoroughly without whipping. Slightly warm the resin components before mixing. After pouring, gently pass a heat gun or torch over the surface to pop any rising bubbles. Working in a warmer, dust-free environment also helps reduce bubble formation.
Tacky resin is typically due to inaccurate measurement of resin and hardener, or insufficient mixing. Ensure precise ratios and thorough mixing. A cold environment can also hinder curing; move the case to a warmer spot. If still sticky, sometimes a very thin, fresh, properly mixed topcoat can resolve the issue.
Conclusion
Crafting a custom resin art phone case offers a unique blend of personal expression and practical protection. By meticulously selecting your materials, preparing your workspace, and mastering the techniques of resin application and layering, you can create a truly durable and visually stunning accessory. The journey from conception to a fully cured, gleaming phone case is rewarding, equipping you with valuable skills and a personalized item that stands out. Remember that patience, precision, and adherence to safety guidelines are your closest allies in achieving lasting beauty and resilience in your resin art endeavors.


