Master the Smokey Eye: Your Ultimate Step-by-Step Guide
Anúncios
Achieving a captivating smokey eye involves a strategic application of eyeshadows, blending techniques, and complementary products to create a diffused, alluring effect suitable for various occasions, enhancing eye shape and depth with sophisticated artistry.
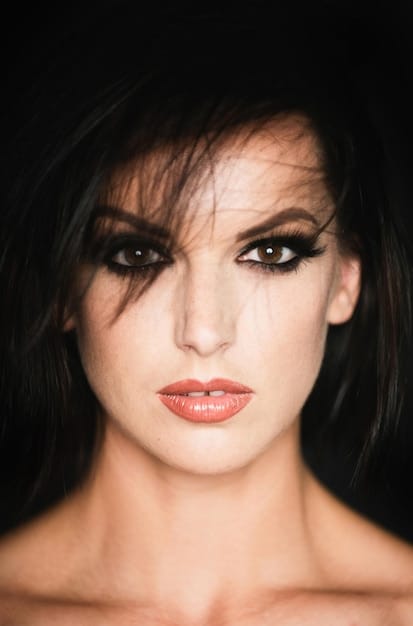
The smokey eye, a timeless and universally flattering makeup look, evokes an air of sophistication and drama. Far from being a one-dimensional technique, it offers a spectrum of possibilities, from subtle definition to intense allure. This guide provides The Ultimate Guide to Achieving a Smokey Eye Look: A Step-by-Step Tutorial, empowering you to master this iconic style with confidence and flair, regardless of your experience level. Discover the secrets to blending, selecting the right shades, and customizing your smokey eye for any occasion.
Understanding the Smokey Eye Foundation
Before diving into application, it is essential to grasp the core principles that define a classic smokey eye. This technique relies on a gradual transition of color, typically from darker shades at the lash line to lighter tones towards the brow bone. The key is seamless blending, ensuring no harsh lines distract from the desired soft, diffused effect. While often associated with black and gray, a smokey eye can incorporate any color palette, allowing for immense creative freedom.
Choosing Your Palette
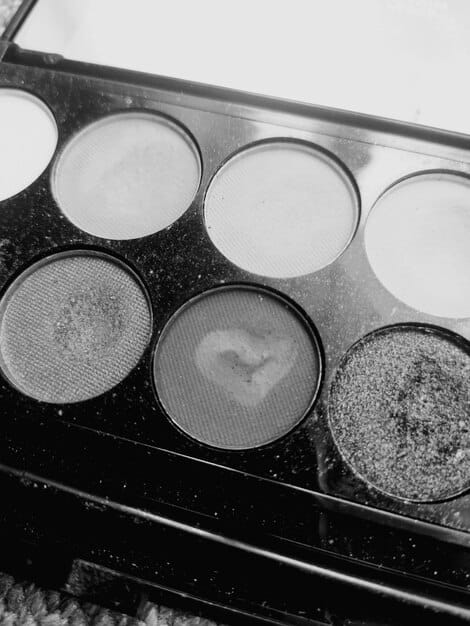
The beauty of a smokey eye lies in its versatility. While traditional looks gravitate towards charcoal, black, and deep browns, contemporary interpretations embrace a diverse range of colors. Consider your eye color, skin tone, and the occasion when selecting your shades.
- Classic Neutrals: Black, charcoal gray, deep brown, and taupe offer timeless elegance and universal appeal.
- Warm Tones: Coppers, bronzes, and terracotta can beautifully enhance green and blue eyes, adding a soft, inviting warmth.
- Cool Tones: Deep blues, plums, and forest greens provide a striking contrast and are particularly flattering for brown eyes.
- Metallic Accents: A touch of shimmer in the inner corner or center of the lid can elevate the look, adding dimension and a captivating sparkle.
Regardless of your chosen colors, aim for at least three shades within the same family: a light base, a medium transition shade, and a deep defining color. This trio forms the backbone of any well-executed smokey eye, providing the necessary depth and dimension.
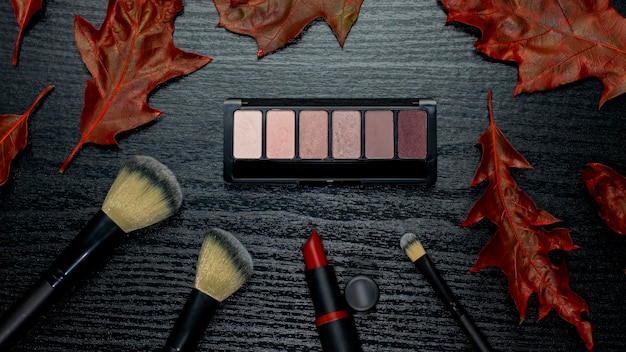
Essential Tools and Products
Having the right tools is just as crucial as selecting the perfect colors. Quality brushes make a significant difference in achieving a professional finish, allowing for precise application and effortless blending. Investing in a few key items will streamline your process and elevate your results.
- Eyeshadow Primer: Essential for longevity and preventing creasing, a good primer creates a smooth canvas for your shadows.
- Flat Shader Brush: Ideal for packing color onto the lid, ensuring intense pigmentation.
- Fluffy Blending Brush: The cornerstone of a smokey eye, used for diffusing harsh lines and seamlessly blending shades.
- Pencil Brush: Perfect for precise application along the lash line and lower lash line, creating definition.
- Eyeliner: A kohl pencil or gel liner is essential for defining the lash line and creating depth.
- Mascara: Crucial for finishing the look, adding volume and length to your lashes.
- Optional: False eyelashes for extra drama, setting spray for extended wear.
Preparation is key. Before applying any makeup, ensure your eyelids are clean and moisturized. A well-prepped canvas not only helps products adhere better but also contributes to a smoother, more even application, leading to a more seamless and polished final look.
Step-by-Step Application: The Classic Smokey Eye
Now, let’s delve into the practical steps of creating a classic black or deep brown smokey eye. This methodical approach ensures precision and helps in mastering the art of blending, which is paramount for this look.
Prime Your Lids
Begin by applying an eyeshadow primer across your entire eyelid, from the lash line up to the brow bone. A thin, even layer is sufficient. Allow it to set for a minute before proceeding. Priming not only enhances the vibrancy of your eyeshadows but also significantly prolongs their wear, preventing creasing and fading throughout the day.
Lay Down Your Base Color
Using a flat shader brush, apply a medium-toned eyeshadow (e.g., a medium gray or brown) all over your eyelid, from the lash line to the crease. This serves as your transition shade and helps to create a smooth gradient when darker colors are introduced. Ensure the color is evenly distributed and build up the intensity if needed.
Define the Crease and Outer Corner
Next, pick up your deepest eyeshadow shade (black, dark gray, or deep brown) with a fluffy blender brush. Apply this color into your crease and on the outer V of your eyelid. The outer V refers to the outer corner of your eye where your upper and lower lash lines meet. Use small, circular motions to blend the color inwards towards the center of your lid, ensuring there are no harsh lines between the base color and the deeper shade. Focus on building depth gradually.
Blending is the most critical step in achieving a flawless smokey eye. Continuous, gentle blending will soften any edges and create that coveted diffused look. Don’t be afraid to go back and forth between your medium and dark shades, adding a little more color and blending until you achieve the desired transition.
Intensify the Lash Line
With a kohl pencil or gel eyeliner, draw a thick line along your upper lash line. Don’t worry about perfection here; the goal is to create a strong base for your darkest shadow. Immediately after applying, smudge the line upwards and outwards using a pencil brush or a small shader brush. This smudged line will serve as the darkest point of your smokey eye, providing intense definition right at the base of your lashes.
To further enhance intensity, use the deepest eyeshadow on top of the smudged liner. Press the shadow onto the lash line, then gently blend it upwards into the darker shade already applied to your lid. This layering technique adds depth and ensures longevity for your intense color.
Smoke Out the Lower Lash Line
To complete the smokey effect, apply the medium-toned eyeshadow to your lower lash line using a pencil brush. Start from the outer corner and bring the color inward, stopping about two-thirds of the way. Then, take a small amount of your deepest eyeshadow and apply it very close to the lower lash line, concentrating on the outer corner. Gently smudge and blend the two shades on the lower lash line to create a cohesive look that mirrors the upper lid.
Be mindful of how much product you apply to the lower lash line. Too much can lead to an overly heavy or raccoon-like appearance. The goal is a subtle, diffused smudge that balances the intensity of the upper lid without overpowering the eye.
Advanced Techniques and Customization
Once you’ve mastered the basic smokey eye, it’s time to explore variations and techniques that can elevate your look. From subtle daytime versions to glamorous evening styles, the smokey eye is incredibly adaptable.
The Subtle Smokey Eye for Daytime
A smokey eye doesn’t always have to be dramatic. For a softer, more office-appropriate look, opt for lighter shades and less intensity. Instead of black, choose deep browns, charcoals, or even muted purples. Follow the same application steps, but use less product and focus on a more diffused blend. A touch of iridescent shadow on the inner corner or center of the lid can add a subtle pop without overwhelming the eye. This approach softens the edges and makes the look suitable for brighter environments, maintaining sophistication without the overt drama.
Incorporating Color and Metallics
Break away from traditional neutrals by introducing vibrant hues. A jewel-toned smokey eye—think emerald green, sapphire blue, or amethyst purple—can be incredibly striking. Apply your chosen color as the deep defining shade, blending it with a complementary neutral. For example, a deep blue could be blended with a charcoal gray for a stunning effect. Metallics, like gold, silver, or bronze, can be pressed onto the center of the eyelid or in the inner corner to add dimension and reflect light beautifully, creating a more glamorous finish. These elements inject personality and make your smokey eye uniquely yours.
Achieving Different Shapes and Effects
- Winged Smokey Eye: Extend your eyeliner into a subtle wing before smudging for a lifted, feline effect. This combination adds an extra layer of allure and elongates the eye.
- Halo Smokey Eye: Apply a shimmery lighter shade to the center of the eyelid, surrounded by darker shades on the inner and outer corners. This creates a captivating halo effect, making the eyes appear larger and more rounded.
- Cut Crease Smokey Eye: For a more defined and dramatic look, use a concealer to create a sharp line above your crease before applying a lighter, shimmering shade. This technique creates a stark contrast between your crease color and your lid color, adding a modern twist to the classic smokey eye.
Experimentation is key to finding what works best for your eye shape and personal style. Don’t shy away from trying new color combinations or adapting techniques to suit your preferences. The beauty of makeup lies in its ability to be customized and transformed.
Finishing Touches and Longevity
The application doesn’t end with eyeshadow. Proper finishing touches are crucial for completing the look and ensuring your smokey eye lasts throughout the day or night. These steps make all the difference in achieving a polished, professional result that withstands the test of time.
Eyeliner and Mascara: The Final Definition
No smokey eye is complete without dramatic eyeliner and voluminous mascara. Re-apply a precise line of black or dark brown eyeliner along your upper lash line to intensify the definition. For added drama, tightline your upper waterline (applying liner to the inner rim of your upper lid), which makes lashes appear thicker and eyes more intense. Then, apply several generous coats of a volumizing and lengthening mascara to both your upper and lower lashes. Wiggle the mascara wand from the roots to the tips to ensure every lash is coated. This final step opens up the eyes and completes the dramatic effect.
False Eyelashes for Added Glamour
For an extra touch of glamour, consider applying false eyelashes. They instantly add volume, length, and drama, perfect for a special occasion smokey eye. Choose a style that complements your eye shape and the overall intensity of your makeup. After applying the lashes, blend them with your natural lashes using another coat of mascara, ensuring a seamless transition and a truly captivating gaze.
Setting Your Masterpiece
To ensure your smokey eye remains flawless for hours, a setting spray is highly recommended. After completing your entire face makeup, hold the setting spray an arm’s length away and mist your face lightly. This not only locks your makeup in place but also helps to meld all the products together, creating a more natural and skin-like finish. A good setting spray will prevent creasing, fading, and smudging, allowing you to enjoy your stunning smokey eye with confidence.
Additionally, keeping a few cotton swabs and makeup remover close by can be helpful for quick touch-ups. Even the most experienced makeup artists need to clean up minor fallout or sharpen lines. Precision and attention to detail, even in the final moments, ensure a truly flawless and long-lasting result.
Common Mistakes to Avoid and Expert Tips
Even with a step-by-step guide, achieving the perfect smokey eye can come with its challenges. Being aware of common pitfalls and equipping yourself with expert advice can significantly improve your results and confidence.
The Importance of Blending
Under-blending is perhaps the most common mistake made with a smokey eye. Harsh lines and unblended edges detract from the soft, diffused look that this style is known for. Utilize a clean, fluffy blending brush without any additional product to soften any harsh lines you might see. Adopt a light hand and use circular or windshield-wiper motions to seamlessly merge colors. Remember, you can always add more color, but it’s harder to take it away. Take your time with this step, as meticulous blending is the secret to a professional finish.
Preventing Fallout
Dark eyeshadows can often lead to fallout, leaving dark specks under your eyes. To minimize this, tap off any excess product from your brush before applying. You can also lightly dust a generous amount of translucent powder under your eyes before starting your eye makeup. After you’re done with your eye makeup, simply sweep away the translucent powder with a large fluffy brush, and it will take any fallout with it. This creates a protective barrier that catches any stray pigment.
Choosing the Right Shades for Your Eye Color
- Blue Eyes: Warm browns, coppers, and bronze tones make blue eyes pop. Purple and taupe shades also enhance their vibrancy without overpowering.
- Green Eyes: Plum, deep purples, and rich cranberry shades are incredibly flattering. Earthy browns and forest greens can also create a stunning, harmonious look.
- Brown Eyes: Brown eyes are highly versatile. Deep blues, emerald greens, and even charcoal grays can create striking contrast. Rose golds and warm browns add a soft, elegant touch.
- Hazel Eyes: Often a mix of green and brown, hazel eyes benefit from both warm browns and greens. Deep plums and rich bronzes can highlight their multifaceted nature.
Understanding color theory and how different shades interact with your natural eye color can help you choose the most flattering palette and maximize the impact of your smokey eye. Don’t be afraid to experiment beyond the classic black and gray to discover what truly enhances your unique features.
Practice Makes Perfect
Like any skill, mastering the smokey eye requires practice. Don’t get discouraged if your first few attempts aren’t perfect. Each time you apply makeup, you’ll learn something new about your eye shape, your tools, and your preferred application techniques. Watch tutorials, experiment with different products, and enjoy the process of self-expression. Makeup is meant to be fun and transformative, so embrace the journey of perfecting your craft.
Maintaining Your Smokey Eye Throughout the Day
A beautifully executed smokey eye deserves to last, resisting creasing, fading, and smudging. Proper maintenance and product choices contribute significantly to its longevity, ensuring your captivating look stays fresh from morning to night or through an entire evening event.
The Role of Primer and Long-Wear Formulas
As mentioned earlier, an eyeshadow primer is your first line of defense against breakdown. It creates a tacky surface that grips the eyeshadow pigments, preventing them from slipping and creasing. Opt for long-wear or waterproof formulas for your eyeliner and mascara, especially if you have oily eyelids or anticipate being in humid conditions. These products are designed to withstand moisture and friction, ensuring your definition remains sharp and your lashes stay voluminous without smudging or flaking.
Layering products correctly also plays a crucial role. Applying powder eyeshadows over a cream base, for example, can enhance intensity and improve staying power. This dual-layer approach locks in color and provides an extra barrier against wear, creating a more resilient finish that holds up against a full day’s activities. Consider using a setting spray after completing your entire makeup look, as it helps to fuse all layers together and creates a protective film, further extending the wear of your eye makeup.
Dealing with Creasing and Fading
- Blotting Papers: If you have naturally oily eyelids, blotting papers can be used gently throughout the day to absorb excess oil without disturbing your eyeshadow. Simply press lightly over your lids.
- Minimal Touching: Avoid touching or rubbing your eyes unnecessarily. The oils from your fingers and the friction can cause your eyeshadow to smudge or fade prematurely.
- Touch-Up Kit: For extended wear, carry a small touch-up kit. This could include a Q-tip for small clean-ups, a small fluffy brush, and a compact of your darker eyeshadow shades. A quick, gentle re-blend in the crease area can instantly refresh your look by softening any lines that may have formed over time.
Maintaining a smokey eye is about smart choices in product selection and mindful habits. By minimizing oil buildup, curbing unnecessary touching, and utilizing long-wear formulations, you can significantly prolong the pristine state of your eye makeup. These preventative measures ensure that your meticulously crafted smokey eye continues to captivate for hours on end, without requiring frequent, extensive touch-ups, allowing you to focus on the moment, rather than your makeup.
Beyond the Eyes: Pulling the Whole Look Together
A striking smokey eye commands attention, but a complete, harmonious makeup look requires balance. Complementary face and lip makeup ensure your intense eye look remains the star without overwhelming your overall aesthetic. The goal is to create a cohesive image where all elements work in concert, enhancing your features in a sophisticated manner.
Balancing Face Makeup
With a dramatic eye, it’s generally best to keep the rest of your face makeup relatively understated. Opt for a foundation or tinted moisturizer that provides even coverage without looking too heavy. Aim for a natural, healthy glow rather than an overtly contoured or highlighted look. A soft blush applied to the apples of your cheeks can add a fresh flush of color without competing with your eyes. Avoid overly strong bronzing or highlighting that could distract from the main focus.
Focus on perfecting your base. A smooth, even complexion ensures that your eyes stand out against a clean canvas. Use concealer to address any under-eye darkness or blemishes, ensuring that your skin looks flawless. Setting your foundation with a light dusting of translucent powder helps to minimize shine and ensures longevity, maintaining a fresh appearance throughout the day or night. The less competition there is on the rest of your face, the more your smokey eye will truly shine and become the focal point of your entire look.
Complementing Lip Choices
The general rule for a smokey eye is to pair it with a nude or muted lip color. This allows your eyes to be the focal point of your face. Choose shades that are close to your natural lip color, such as soft pinks, peachy nudes, or light browns. A matte or satin finish is often preferred, as highly glossy or bold lipsticks can create too much competition with the dramatic eye makeup.
However, fashion rules are often made to be broken. For a truly daring evening look, a deep berry or even a classic red lip can be surprisingly chic with a smokey eye, provided the eye makeup itself isn’t overwhelmingly dark and the rest of the face is kept very clean. This combination exudes confidence and high fashion. The key is to carefully consider the occasion and your personal style. Regardless of your choice, ensure your lips are well-hydrated and prepped before application to achieve a smooth and polished finish, enhancing the overall harmony of your makeup.
The Evolution of the Smokey Eye: Personalization and Trends
While the classic black smokey eye remains iconic, the beauty world constantly evolves, bringing new interpretations and techniques to this beloved look. Understanding how to personalize and adapt to current trends ensures your smokey eye always feels fresh and relevant, reflecting your individual style.
Beyond Black: The Color Spectrum
The modern smokey eye is far from monochromatic. Experiment with a range of colors to create unique effects: a warm brown smokey eye for a subtle daytime glam, a deep plum for intriguing depth, or even a vibrant jewel tone for a bold statement. Gradient blends using complementary colors, like a deep green fading into a golden olive, add sophistication. These variations allow the smokey eye to transcend its traditional boundaries, adapting to different moods, outfits, and even seasons. The beauty lies in treating the technique as a foundation upon which any color story can be artfully constructed.
Consider your personal aesthetic and the message you want to convey. A charcoal gray smokey eye might project sleek professionalism, while a rich bronze could evoke earthy warmth. Don’t be afraid to mix textures—a matte base with a shimmery topper can add subtle complexity. This exploration of color and finish ensures the smokey eye remains a versatile tool in your beauty arsenal, continuously offering new avenues for expression and customization.
Incorporating Sparkle and Glitter
For evenings or special occasions, adding sparkle can elevate a smokey eye from stunning to show-stopping. Glitter, shimmers, and metallic toppers provide an instant touch of glamour. These can be strategically placed: a dab of glitter glue and loose glitter on the center of the eyelid for a captivating pop, or a shimmery eyeshadow blended over a matte base for an ethereal glow. Liquid glitter liners can also be used to define the lash line, adding a subtle yet impactful twinkle. The key is balance—let the glitter enhance, not overpower, the diffused smokey effect.
Applying glitter requires a slightly different approach to minimize fallout. Using a glitter adhesive or a damp brush can help pigments adhere better. Pressing the glitter onto the lid rather than sweeping it ensures maximum impact and reduces dispersion. This element transforms the classic smokey eye into a party-ready statement, catching the light with every blink and ensuring your eyes remain the center of attention, adding a layer of sophisticated playfulness to the timeless appeal of the look.
Adapting to Eye Shape and Features
- Hooded Eyes: For hooded eyes, focus on bringing the darker shades higher into the crease, ensuring they are visible when the eyes are open. Soft blending upwards helps to create an illusion of depth.
- Almond Eyes: Almond eyes are versatile and can carry most smokey eye styles beautifully. Enhance their natural shape with a classic blend, or extend the outer corner for a more elongated look.
- Round Eyes: To elongate round eyes, focus on extending the darkest shadow outwards and upwards in the outer corner, creating a more cat-eye effect within the smokey gradient.
- Close-Set Eyes: Lighten the inner corner with a bright, shimmery shade and concentrate the darkest shadows on the outer half of the lid to create an illusion of wider-set eyes.
Understanding your unique eye shape allows for strategic placement of eyeshadows that enhance and flatter. The smokey eye should be tailored to your features, not a one-size-fits-all approach. Experiment with how different blending techniques and color placements can subtly alter the appearance of your eyes, ensuring the smokey effect enhances your natural beauty rather than concealing it. This personalized approach truly unlocks the full potential of this versatile makeup technique for every individual.
| Key Aspect | Brief Description |
|---|---|
| 🎨 Product Selection | Choose quality shadows (light, medium, dark), primer, and blending brushes. |
| ↔️ Seamless Blending | Essential for diffused, professional finish; avoid harsh lines. |
| ✨ Customization | Adapt colors, intensity, and shapes for various occasions or eye types. |
| ⏳ Longevity | Use primer, setting spray, and waterproof formulas for lasting wear. |
Frequently Asked Questions About the Smokey Eye
For beginners, the absolute essentials include an eyeshadow primer to ensure longevity, a dark eyeshadow (like black or deep brown), a blending brush, and mascara. A medium transition shade is also highly recommended to aid seamless blending. Starting simple with these tools allows you to learn the basic technique without being overwhelmed by too many products.
To make your smokey eye last all day, start with a high-quality eyeshadow primer as your base. Layering powder shadows over a cream or gel liner can also increase wear time. Finish your entire makeup look with a setting spray, which creates a protective film over your makeup, helping to prevent creasing and fading throughout the day, even in humid conditions.
The smokey eye can absolutely be worn during the day! For a daytime look, opt for softer, muted shades like browns, taupes, or charcoal grays instead of intense black. Use less product and focus on a very diffused blend to create a subtle definition. This makes the look more understated and appropriate for casual or professional settings.
To clean up eyeshadow fallout, first tap off excess product from your brush before application. A clever trick is to apply a thick layer of translucent powder under your eyes before starting your eye makeup. Once your eye makeup is complete, simply sweep away the translucent powder with a fluffy brush, and it will effortlessly remove any fallen pigment without smudging your base.
For a classic black smokey eye, a nude or subtle lip color is typically recommended. Shades like soft pinks, peaches, or light browns in a matte or satin finish complement the dramatic eyes without competing for attention. This balance keeps the focus on the eyes, creating a sophisticated and harmonious overall makeup look that is both elegant and impactful.
Conclusion
Mastering the smokey eye is an artistry that merges technical precision with creative expression. From selecting the perfect palette and tools to executing flawless blending and refining with finishing touches, each step contributes to a high-impact, captivating look. Embrace the journey of practice and experimentation, allowing this guide to empower your confidence in creating a smokey eye that truly reflects your individual style and flair. This versatile technique adapts effortlessly from subtle daytime elegance to dramatic evening glamour, proving its timeless appeal in the beauty landscape.


