Master Digital Mood Boards for Interior Design Projects
Anúncios
Creating a digital mood board for interior design projects streamlines the creative process, offering a dynamic and collaborative platform to visualize concepts, consolidate inspirations, and present design visions effectively to clients.
Embarking on an interior design project, whether for a client or your own home, often begins with a swirling vortex of ideas, inspirations, and material samples. Transforming this initial creative chaos into a cohesive vision is where the power of a digital mood board truly shines. It’s an indispensable tool for designers and enthusiasts alike, offering a structured yet flexible canvas to articulate a design narrative. Learning how to create a digital mood board for interior design projects is not just about aesthetics; it’s about efficiency, collaboration, and bringing your design dreams to life with precision and clarity.
Understanding the Essence of a Digital Mood Board
A digital mood board is far more than just a collection of pretty pictures; it’s a dynamic visual narrative that encapsulates the core essence of an interior design project. Think of it as your project’s DNA, where every element – from color palettes and textures to furniture styles and lighting – converges to tell a cohesive story. This initial phase of conceptualization is critical, allowing you to explore different aesthetics and ensure they resonate with the client’s vision or your personal aspirations. It’s about distilling abstract ideas into tangible, shareable concepts before any physical commitment is made.
The primary role of a digital mood board is to provide clarity and direction. It helps in defining the overall atmosphere and functional requirements of a space. By curating a collection of images, notes, and digital samples, designers can articulate complex ideas in a universally understandable visual language. This eliminates ambiguity and ensures that all stakeholders are aligned from the very beginning.
Beyond Traditional Boards: The Digital Advantage
Traditional physical mood boards, with their cut-out magazine clippings and glued fabric swatches, hold a certain nostalgic charm. However, digital mood boards offer unparalleled advantages in terms of flexibility, accessibility, and collaboration. They can be updated instantly, shared effortlessly across continents, and accessed from any device, anytime. This dynamic nature is particularly beneficial in a fast-paced design industry where changes are frequent and communication needs to be seamless.
One of the key benefits lies in the ease of iteration. If a client suggests a different shade of blue or prefers a more minimalist aesthetic, digital elements can be swapped out with a few clicks, making the design process exceptionally agile. This immediate feedback loop saves time and resources, preventing costly mistakes down the line.
- Instant Updates: Modify elements, colors, and textures in real-time.
- Global Collaboration: Share and gather feedback from clients or team members anywhere.
- Sustainability: Reduce material waste by working with digital samples.
- Organizational Efficiency: Keep all project inspirations neatly organized in one accessible location.
Ultimately, a well-crafted digital mood board serves as a powerful communication tool. It translates abstract concepts into a clear, compelling visual story, acting as a living document that evolves with the project. It ensures that everyone involved, from the client to contractors, understands the overarching design direction, fostering a smoother, more efficient, and ultimately more successful interior design journey.
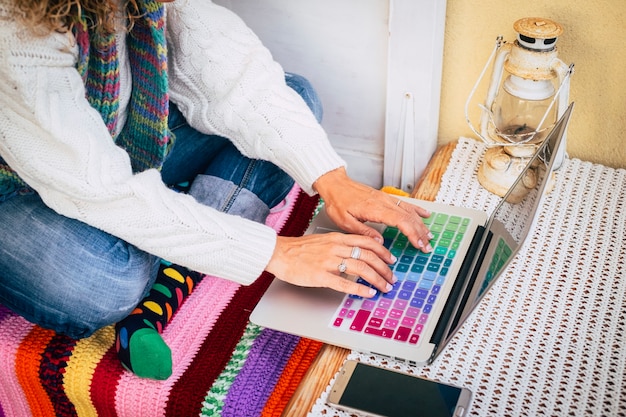
Choosing the Right Tools for Your Digital Mood Board
The digital landscape offers a plethora of tools, each with its unique strengths, to help you create stunning and effective mood boards. The selection of your preferred platform greatly impacts your workflow, collaboration capabilities, and the overall aesthetic presentation of your design vision. Identifying the features that align with your specific needs is crucial for a seamless experience. Consider factors such as ease of use, collaborative features, integration capabilities, and cost when making your choice.
Top Platforms and Software for Designers
Professional designers often gravitate towards tools that offer a robust suite of features, allowing for precise control and high-quality presentations. Platforms like Pinterest and Milanote are popular for their intuitive interfaces and extensive content libraries, making them ideal for initial brainstorming and gathering diverse inspirations. They allow for easy pinning of images, videos, and links, creating a centralized hub for ideas.
For those seeking more advanced design capabilities, dedicated graphic design software like Adobe Photoshop or Canva provide superior control over layout, typography, and image manipulation. Photoshop, in particular, offers unparalleled customization, allowing designers to create highly detailed and polished mood boards that reflect their unique style. Canva, on the other hand, is known for its user-friendly drag-and-drop interface and vast template library, making it accessible even for beginners.
- Pinterest: Best for initial inspiration gathering and trend spotting.
- Milanote: Excellent for visual organization, note-taking, and team collaboration.
- Miro: Great for collaborative brainstorming and interactive presentations.
- Adobe Photoshop/InDesign: Ideal for professional-grade, highly customized layouts.
- Canva: User-friendly with many templates, perfect for quick and attractive boards.
When evaluating tools, think about how you typically work and what level of detail your projects demand. If collaboration is key, ensure the platform supports real-time editing and commenting. If you need to integrate specific product samples, look for tools that allow easy image uploads and annotations. The right tool empowers you to translate your ideas into a compelling visual story without technological hurdles.
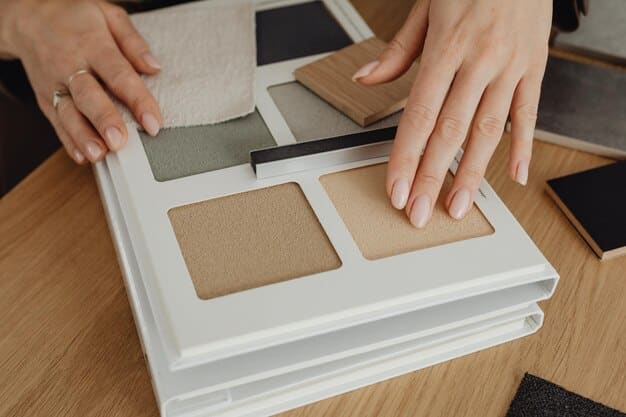
Gathering Inspiration and Curating Content
The foundation of any compelling digital mood board lies in the breadth and quality of its inspiration. This initial phase is a journey of discovery, where you immerse yourself in various sources to unearth images, textures, colors, and concepts that resonate with the project’s vision. It’s an iterative process of collecting, sifting, and refining to ensure every element contributes meaningfully to the overall narrative. This step is about casting a wide net, then meticulously selecting the gems that will form the core of your design.
Where to Find High-Quality Digital Assets
The digital world is a treasure trove of resources for design inspiration. High-quality images are paramount for a professional-looking mood board. Stock photo websites like Unsplash, Pexels, and Pixabay offer vast libraries of free, high-resolution images that can be used without attribution. For more specific design elements, consider specialized platforms that showcase interior design projects, such as Houzz, Architectural Digest, and Elle Decor. These sites often feature curated collections and professional photography, providing abundant inspiration for furniture layouts, material combinations, and spatial aesthetics.
Beyond visual inspiration, consider textures and materials. Many material suppliers offer digital swatch libraries or high-resolution images of their products. Websites like Material Bank or manufacturer-specific sites can be instrumental in sourcing realistic representations of fabrics, wood, stone, and metal. Don’t forget the power of actual product images from online retailers; these can give a clear picture of specific furniture pieces, lighting fixtures, and decorative objects.
The process of gathering inspiration should be comprehensive, encompassing all aspects of interior design. This includes not just furniture and decor, but also lighting, flooring, wall treatments, and even the nuances of natural light within a space. Think about the overall feeling you want to evoke: is it serene, vibrant, minimalist, or luxurious? Each element you collect should guide you closer to that overarching sentiment.
When curating content, selectivity is key. Avoid the temptation to include every appealing image. Instead, focus on pieces that truly communicate the intended mood and style. Group similar items, identify recurring patterns, and begin to discern the overarching themes that will form the backbone of your digital mood board. This disciplined approach ensures that your board remains focused, harmonious, and effective in conveying your design intent to others.
Structuring Your Digital Mood Board for Clarity
A well-structured digital mood board is akin to a thoughtfully composed piece of music: each element plays a part, contributing to a harmonious whole. Without clear organization, even the most beautiful inspirations can become a jumbled mess, failing to convey a cohesive vision. The goal is to arrange your collected assets in a way that tells a clear, compelling story about the intended design, making it easy for viewers to understand the overarching aesthetic and functional goals. This requires intentional placement and logical grouping of elements.
Essential Sections and Principles of Layout
To achieve maximum clarity, consider dividing your mood board into distinct sections, each dedicated to a specific design aspect. A common approach involves creating main categories such as “Color Palette,” “Furniture & Fixtures,” “Materials & Textures,” and “Overall Mood & Inspiration.” Within these categories, you can further refine by grouping related items. For instance, under “Furniture & Fixtures,” you might have subsections for seating, tables, and lighting. This hierarchical organization ensures that no detail is overlooked and that the design story unfolds logically.
The principles of visual design, such as balance, contrast, and hierarchy, are just as important in a mood board as they are in the final interior space. Use larger images for key inspiration pieces or anchor furniture to draw immediate attention. Smaller images can then be used for supporting details, accessories, or material swatches. Pay attention to negative space; giving elements room to breathe prevents the board from looking cluttered and overwhelming.
- Color Palette: Showcase primary, secondary, and accent colors with corresponding hex codes or swatches.
- Furniture & Fixtures: Include images of specific pieces, highlighting scale, style, and finish.
- Materials & Textures: Display high-resolution images of fabrics, wood, stone, metal, etc.
- Finishing Touches: Accessories, artwork, lighting, and decorative elements that define the space.
- Overall Mood: Inspirational imagery that evokes the desired feeling and atmosphere.
Beyond static elements, consider how typography might be integrated to title sections or add brief explanatory notes. The font choice itself can contribute to the mood, so select typefaces that align with the design’s overall aesthetic. Remember, the digital format allows for flexibility; don’t hesitate to experiment with different layouts until you find one that best articulates your vision. The ultimate measure of a well-structured mood board is its ability to communicate complex design ideas effortlessly and effectively to anyone who views it.
Adding Detail and Functionality to Your Digital Mood Board
Once the foundational elements of your digital mood board are in place, the next step involves refining it with granular details and functional annotations. This transforms a simple collection of images into a working design document, providing deeper insights and practical information for implementation. It’s about moving beyond mere inspiration to concrete planning, ensuring that every design choice is not only aesthetically pleasing but also viable and clearly communicated. This layer of detail becomes invaluable as the project progresses from concept to execution.
Annotating Elements and Integrating Practical Information
Crucial to a truly effective digital mood board is the ability to annotate individual elements. Beyond just visual cues, adding text descriptions, dimensions, and even links to specific products can elevate your board from a conceptual tool to a comprehensive project guide. For instance, alongside an image of a sofa, you might include its dimensions, fabric details, vendor information, and estimated price. For paint colors, hex codes or specific brand names are essential. This practical information bridges the gap between vision and reality.
Consider dedicating sections or overlays for specific details. For materials, include swatches with notes on their properties, such as durability or maintenance requirements. If using a particular light fixture, provide information on its wattage, color temperature, and mounting type. This level of detail ensures that anyone reviewing the mood board has a clear understanding of the proposed items and their implications.
Integrating dynamic elements can further enhance functionality. Many digital mood board tools allow for the embedding of videos, 3D models, or interactive walkthroughs. Imagine a short video showcasing how a particular fabric drapes or a 3D rendering of a custom furniture piece. These dynamic elements add an immersive quality, providing a richer context than static images alone.
Furthermore, think about future stages of the project. Can you include a section for potential subcontractors or specific trade references? Could there be a preliminary budget overview linked to the selected items? By thinking ahead and populating your mood board with such practical information, it becomes a powerful, evolving resource that supports the entire design process, from conceptualization to final installation. This meticulous approach speaks to professionalism and foresight, greatly aiding in the smooth execution of any interior design project.
Collaborating and Presenting Your Digital Mood Board
Transforming your meticulously crafted digital mood board from a personal vision into a shared reality requires effective collaboration and compelling presentation. A mood board is not merely a static collection of ideas; it’s a dynamic communication tool designed to engage clients, gather feedback, and align all stakeholders. Mastering the art of presenting your board ensures that your design narrative is understood, appreciated, and ultimately approved. This phase emphasizes interaction and persuasion, setting the stage for project success.
Sharing with Clients and Gathering Feedback Efficiently
Once your digital mood board is refined, sharing it with clients should be a seamless process. Most digital mood board platforms offer various sharing options, from simple view-only links to more interactive collaboration features. Opt for platforms that allow for commenting and annotation, enabling clients to provide specific feedback directly on the elements that resonate – or don’t. This specificity streamlines the review process, avoiding vague generalities and focusing discussions on actionable points.
When presenting, walk your client through the mood board section by section. Explain the rationale behind your choices, how each element contributes to the overall concept, and how it addresses their initial brief. Frame the discussion as a collaborative exploration rather than a one-way presentation. Ask open-ended questions like, “What feelings does this color palette evoke for you?” or “Does this furniture style align with the functionality you envision?” This approach encourages active participation and makes the client feel invested in the design process.
- Interactive Platforms: Use tools that allow direct comments and annotations.
- Scheduled Reviews: Set dedicated times for client feedback sessions.
- Clear Communication: Articulate the design rationale behind each element.
- Iterative Process: Be prepared to make revisions based on feedback.
An often-overlooked aspect of digital collaboration is version control. As you incorporate feedback and make revisions, ensure your platform allows you to save different versions of the mood board. This means you can always refer back to previous iterations if needed, or demonstrate how the design has evolved based on client input. Transparent revision tracking builds trust and ensures clarity throughout the project lifecycle.
Ultimately, your digital mood board is a powerful vehicle for storytelling. Present it with enthusiasm and confidence, allowing its visual narrative to speak volumes. By fostering open communication and embracing an iterative feedback loop, you not only gain client approval but also strengthen the designer-client relationship, paving the way for a successful and harmonious interior design project.
| Key Point | Brief Description |
|---|---|
| 💡 Tool Selection | Choose platforms based on required features like collaboration and integration. |
| 🎨 Content Curating | Gather high-quality images, textures, and product ideas from diverse sources. |
| 📐 Board Structure | Organize elements into clear sections for color, furniture, materials, and mood. |
| 🤝 Collaboration | Utilize interactive features for client feedback and efficient project evolution. |
Frequently Asked Questions About Digital Mood Boards
A digital mood board is a visual collage of images, textures, colors, and design elements assembled on a digital platform. It serves as a conceptual blueprint, communicating the overall aesthetic and mood for an interior design project, helping designers and clients visualize the proposed look and feel of a space.
Digital mood boards offer several advantages including easy editing and updates, seamless remote collaboration, reduced material waste, and instant sharing capabilities. They also allow for the integration of dynamic content like videos and 3D models, providing a more comprehensive and interactive design experience.
Popular tools include Pinterest for inspiration gathering, Milanote and Miro for interactive brainstorming, and Adobe Photoshop or Canva for professional, customized layouts. The best tool depends on your specific needs for collaboration, design flexibility, and ease of use.
Gather content from various sources, including stock photo sites, design blogs, Pinterest, and material supplier websites. Focus on high-resolution images of furniture, finishes, color swatches, and inspirational scenes that clearly convey the desired aesthetic and functional aspects of the space.
Use interactive digital mood boards that allow for comments and annotations. Walk clients through each section, explaining your design choices and how they align with their vision. Encourage direct feedback and be prepared to iterate, ensuring the board evolves collaboratively with their input.
Conclusion
The art of interior design is profoundly transformed by the strategic implementation of digital mood boards. Far from being a mere trend, these visual narratives serve as indispensable tools for streamlining the creative process, fostering clear communication, and ultimately, ensuring project success. By embracing the flexibility and collaborative potential of digital platforms, designers can transcend the limitations of traditional methods, bringing their visions to life with unparalleled precision and efficiency. The journey from abstract idea to tangible design is made significantly smoother when guided by a well-crafted digital mood board.


