How to Choose the Right Concealer for Your Skin Tone

Anúncios
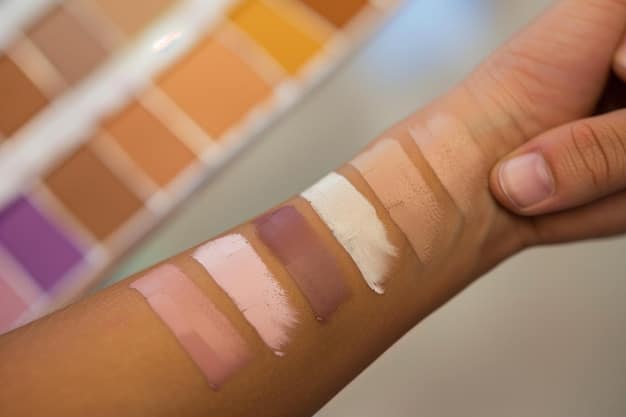
Achieving a flawless complexion begins with selecting the ideal concealer, a vital step that demands understanding your skin’s unique undertones, shade, and specific concerns to ensure seamless blending and effective coverage for a natural, perfected look.
Navigating the vast world of makeup can be daunting, but few products are as transformative as concealer. Learning how to choose the right concealer for your skin tone is a fundamental skill that can elevate your entire makeup routine, offering the power to visibly diminish imperfections, brighten tired eyes, and create a perfectly even canvas.
Understanding Your Skin Tone and Undertone
Before diving into product types, a crucial first step in selecting the ideal concealer is a thorough understanding of your own skin. This goes beyond simply identifying if your skin is light, medium, or dark; it involves pinpointing its unique undertone, which plays a pivotal role in ensuring a seamless, natural finish.
Your skin tone refers to the surface color of your skin, which can change due to sun exposure or seasonal variations. Undertone, however, is the subtle hue beneath the surface of your skin, remaining constant regardless of tan or pallor. Recognizing your undertone is key to preventing your concealer from looking ashy, too yellow, or too pink against your natural complexion.
Identifying Your Undertone
There are generally three main categories of undertones: cool, warm, and neutral. Knowing which one you possess will significantly narrow down your concealer options and lead you to a much more accurate match.
- Cool Undertones: Your skin has hints of pink, red, or blue. You might notice that silver jewelry complements your skin better than gold, or that your veins appear blue or purple on your wrist.
- Warm Undertones: Your skin has golden, peachy, or yellow tints. Gold jewelry tends to look best on you, and your veins might appear greenish.
- Neutral Undertones: Your skin has a balance of both warm and cool tones. You might find that both gold and silver jewelry look good on you, and your veins appear a mix of blue and green.
A simple way to check your undertone is the “vein test.” Look at the veins on your wrist under natural light. If they look blue or purple, you likely have cool undertones. If they appear green, you probably have warm undertones. If you can’t quite tell, or they seem to be a mix of both, you’re likely neutral. This initial assessment provides a solid foundation for choosing the right concealer shade.
Once you’ve identified your undertone, you can start looking for concealers that align. For cool undertones, opt for concealers with a slight pinkish or bluish hue. For warm undertones, go for those with golden or peachy tints. Neutral undertones offer more flexibility, allowing you to choose concealers that are neither overly warm nor overtly cool, often marked as “neutral” shades by brands. This foundational knowledge ensures that your concealer truly blends into your skin rather than sitting on top of it, creating a more harmonious and natural appearance.
Choosing the Right Shade for Different Concerns
Concealer isn’t a one-size-fits-all product; its purpose dictates the shade you should choose. While a perfect skin-matching shade is ideal for general blemishes, specific concerns like dark circles or redness require a different approach, often involving color correction before or in conjunction with your standard concealer. Selecting the proper shade for each concern is a fundamental step in achieving a flawless, natural finish, ensuring efficacy without cakey build-up.
The goal is to neutralize unwanted tones rather than simply covering them. This makes the imperfection less noticeable, allowing your skin-toned concealer to do its job more effectively with less product, resulting in a more natural and seamless look.
Targeting Dark Circles
Dark circles typically have a blue or purple undertone. To counteract this, a color corrector with an opposing hue on the color wheel is your best friend. Orange and peach correctors are designed to neutralize blue and purple tones, making them visibly disappear before you even apply your skin-toned concealer.
- Peach/Orange Corrector: For light to medium skin tones, a peach-toned corrector works wonders. For deeper skin tones, a more orange-toned corrector will be more effective.
- Concealer Shade: After applying the corrector, follow with a concealer that is one to two shades lighter than your natural skin tone. This helps to brighten the under-eye area, giving you a more awake and refreshed appearance. Be cautious not to go too light, as this can make the area look grey or ashy.
Apply the color corrector sparingly only on the darkest areas, then gently pat your skin-toned concealer over it. The combination will effectively mask the darkness without looking heavy or layered. The slight brightening effect under the eyes helps to lift the entire face, giving a more youthful and vibrant look that is both subtle and powerful.
Masking Blemishes and Redness
For blemishes, redness, or hyperpigmentation, the approach is slightly different. These concerns often present with red undertones that need to be neutralized to disappear seamlessly into your skin. Choosing the correct shade for these areas is vital to prevent the blemish from appearing more prominent or a different color than the surrounding skin.
- Green Corrector: Green is the opposite of red on the color wheel, making green-tinted correctors ideal for neutralizing redness from acne, rosacea, or broken capillaries. Apply a thin layer directly to the red area.
- Concealer Shade: For blemishes and general redness, select a concealer that precisely matches your skin tone. Using a lighter shade will highlight the area, making the blemish more noticeable. A darker shade will make it look muddy and obvious.
After applying a tiny amount of green corrector, gently tap a skin-matching concealer over it. Blend the edges seamlessly into your skin to avoid a visible demarcation line. The goal is to make the imperfection disappear into your complexion so that it looks like your natural skin and is undetectable under foundation. Precision is key when concealing blemishes; use a small brush or your fingertip to apply product only where needed.
Understanding these specific techniques for different concerns ensures that your concealer truly works for you, providing targeted correction and coverage. It transforms concealer from a simple cover-up into a strategic tool for perfecting your complexion, leading to a more polished and natural makeup look.
Considering Concealer Formulas and Finishes
The world of concealers offers a dizzying array of formulas, each designed for specific skin types, concerns, and desired finishes. Beyond just shade and undertone, understanding these formulations is paramount to ensuring your concealer performs optimally and looks natural throughout the day. The right formula can make the difference between a flawless finish and a product that settles into fine lines, looks patchy, or provides insufficient coverage.
Matching the formula to your skin type is crucial. Just as you wouldn’t use a heavy cream on oily skin, using the wrong concealer formula can exacerbate existing skin issues or simply not provide the desired results. Each type offers unique benefits and applications, allowing for a tailored approach to your individual needs.
Liquid Concealers
Liquid concealers are perhaps the most versatile and popular type, offering a wide range of coverage levels and finishes. They typically come in tubes with wand applicators, making them easy to apply directly to the skin.
- Coverage and Finish: Liquid concealers can range from sheer to full coverage, and their finishes vary from natural to dewy to matte.
- Best For: They are excellent for all skin types, particularly for normal, combination, and oily skin, as they are less likely to crease or look heavy. They are also ideal for the under-eye area due to their blendable nature and non-drying properties.
- Application: Apply a small amount and blend with a damp beauty sponge, brush, or your fingertip using a patting motion to meld the product into the skin.
Their fluid texture makes them incredibly buildable, allowing you to layer for more coverage without looking cakey. This flexibility makes liquid concealers a staple in most makeup bags, suitable for both everyday use and more specialized makeup looks.
Cream Concealers
Cream concealers often come in pots, palettes, or sticks, offering a thicker consistency than liquids. They are known for providing medium to full coverage, making them powerful tools for more significant imperfections.
- Coverage and Finish: Cream concealers typically offer medium to full coverage with a
satin or natural finish. - Best For: They are well-suited for normal to dry skin types, as their richer texture provides hydration and is less likely to emphasize dry patches. They are excellent for concealing blemishes, discoloration, and hyperpigmentation due to their higher pigment concentration.
- Application: Use a small, dense brush or your finger to warm the product before applying. Blend well, focusing on the area needing coverage.
While effective, cream concealers can sometimes settle into fine lines, especially if not set properly. For this reason, those with oily skin might find them too heavy. However, for those needing robust coverage and a comfortable-wearing formula, cream concealers can be a true game-changer, providing excellent camouflage for stubborn areas.
Stick Concealers
Stick concealers, as the name suggests, come in a solid stick format. They are known for their portability and ease of application, offering convenience and control.
- Coverage and Finish: Stick concealers generally provide medium to full coverage with a more matte or satin finish.
- Best For: They are great for normal to oily skin types, as their drier consistency can help absorb excess oil. They are particularly effective for spot concealing blemishes or redness, offering targeted application.
- Application: Apply directly to the area of concern and blend with your finger or a brush. Due to their thicker texture, careful blending is essential to avoid a streaky appearance.
While convenient, stick concealers can sometimes emphasize dry patches or fine lines if not adequately prepped with moisturizer. They are less ideal for large areas like the under-eye, as their drier nature might contribute to creasing. However, for quick touch-ups on the go or pinpoint concealing, they are an indispensable tool, providing concentrated coverage exactly where it’s needed.
Application Techniques for a Flawless Finish
Choosing the perfect concealer is only half the battle; knowing how to apply it correctly is what truly transforms your complexion. Proper application ensures the product blends seamlessly, provides effective coverage, and lasts throughout the day without creasing, caking, or looking unnatural. The technique you employ can significantly impact the overall finish, turning a good product into a great one.
Different areas of the face require varying approaches due to skin texture, common concerns, and natural movement. Mastering these techniques will empower you to create a smooth, even canvas that looks like your skin, only better, without the tell-tale signs of heavy makeup. It’s about strategic placement and gentle blending.
Concealing Under-Eye Circles
The under-eye area is delicate and prone to creasing, requiring a gentle touch and specific technique to cover dark circles effectively while maintaining a natural look. The goal is to brighten and even out the tone without depositing too much product, which can settle into fine lines.
- Prep: Start by moisturizing the under-eye area. Hydrated skin is less likely to crease and provides a smoother canvas for concealer.
- Placement: Instead of applying a full semicircle, draw a small inverted triangle or a few dots directly on the darkest parts of your under-eye area and extending slightly down toward your cheekbone. This method helps to lift and brighten the entire eye area, creating a more cohesive blend.
- Blend: Gently pat the product into your skin using your ring finger (which provides the least pressure), a damp beauty sponge, or a soft, fluffy concealer brush. Always pat, never drag, to avoid pulling the delicate skin and to ensure the product is pressed into place rather than wiped away.
After blending, allow the concealer to warm up on your skin for a minute or two. For added longevity and to prevent creasing, lightly set the area with a translucent setting powder using a small, fluffy brush. Press the powder gently rather than sweeping it, focusing on areas prone to creasing. This locks the concealer in place without adding texture.
This technique creates a bright, lifted appearance, making you look more awake and refreshed. The patting motion helps to really melt the product into the skin, making it virtually undetectable and ensuring a smooth finish that lasts for hours without caking.
Spot Concealing Blemishes and Redness
Spot concealing requires precision and an understanding of how to make imperfections disappear into your skin, rather than simply covering them. The aim is to create an illusion of perfectly even skin, for which less is often more. Over-applying concealer to blemishes can highlight them further, drawing unwanted attention.
- Targeted Application: Pick a small, precise brush (such as a detail concealer brush or a synthetic eyeshadow brush) or even a clean Q-tip. Dip it lightly into your skin-matching concealer.
- Gentle Tap: Apply the smallest amount of product directly onto the center of the blemish or the reddest part of the imperfection. Do not drag the brush; simply tap to deposit the product.
- Blend the Edges: Once the product is placed, gently stipple and blend only the very edges of the concealer into the surrounding skin. The goal is to seamlessly marry the concealed spot with your natural complexion without disturbing the coverage on the blemish itself.
If dealing with significant redness, remember to use a green color corrector underneath your skin-toned concealer, applying it in a very thin layer first. After applying, avoid over-blending or rubbing the area, as this can lift the product and undo your work. For longevity, a light dusting of translucent powder can help set the concealer, but be mindful not to apply too much, which could draw attention to the texture of the blemish. This meticulous approach ensures that individual imperfections are camouflaged effectively, blending seamlessly for a truly flawless finish.
Common Concealer Mistakes to Avoid
Even with the right product in hand, common application errors can undermine your efforts to achieve a flawless complexion. Avoiding these pitfalls is as crucial as selecting the correct shade and formula. Many issues, from creasing to looking cakey, stem from simple missteps in the application process, rather than the product itself. Identifying and correcting these habits can dramatically improve your makeup results, leading to a more natural and polished appearance.
Learning from common mistakes allows for more effective use of your concealer, ensuring it enhances your natural beauty rather than drawing attention to areas you’re trying to perfect. A mindful approach to application can prevent frustrating results and wasted product, making your routine more efficient and impactful, ensuring a true, second-skin finish.
Using the Wrong Shade or Undertone
One of the most frequent mistakes is using a concealer that doesn’t match your skin’s true shade or undertone. This error can lead to a host of problems, making your under-eye area appear ashy or gray, or your blemishes standing out as bright spots against your natural skin.
- Too Light Under Eyes: While a slightly lighter shade is often recommended for brightening, going excessively light can create a stark, ghostly effect. This can make your under-eye area appear unnatural or even emphasize puffiness.
- Incorrect Undertone Match: If your concealer has a strong pink undertone and your skin is warm, it will look noticeably off. Similarly, a yellow-based concealer on cool skin will create an unnatural contrast. This mismatch prevents the concealer from blending seamlessly, drawing attention to the product rather than concealing the imperfection.
Always swatch concealers on your jawline or the area you intend to conceal (e.g., under the outer corner of your eye) in natural light before purchasing. Give it a few minutes to settle, as some formulas can oxidize and change color. For blemishes, ensure the shade is an exact match for your skin tone to make them truly disappear. A correct shade and undertone match is the cornerstone of a natural and effective concealer application, creating an undetectable finish.
Over-Applying Product and Improper Blending
Another common mistake is applying too much concealer or failing to blend it properly. The misconception that more product equals more coverage often leads to a heavy, cakey, or unnatural look. Concealer should enhance your skin, not mask it completely, especially when dealing with smaller areas.
- Excess Product: A thick layer of concealer, particularly under the eyes, is almost guaranteed to settle into fine lines and accentuate texture, making you look older or more tired. For blemishes, too much product can sit on top of the skin, making the blemish more noticeable.
- Poor Blending: Not blending the edges of your concealer completely can leave harsh lines or visible demarcation between the concealed area and your natural skin. This creates an obvious “makeup” look rather than a seamless finish.
Always start with a tiny amount of product. It’s much easier to build up coverage than to remove excess without disturbing your base makeup. Use a tapping or patting motion to blend, pressing the product into the skin rather than rubbing it around. This technique ensures the product melts into your complexion, providing natural, even coverage. Pay extra attention to the edges, feathering them out gently to create an invisible transition. Precision and patience in blending will yield the most natural and long-lasting results, ensuring your skin looks perfected without looking made up.
Maintaining Your Concealer Look Throughout the Day
Even the most perfectly chosen and applied concealer can fall victim to the elements, skin oils, or simply the passage of time. Ensuring your concealer looks fresh and effective from morning till night requires a few strategic steps, extending its longevity and preventing common issues like creasing, fading, or caking. A well-maintained concealer provides consistent coverage and a polished appearance that withstands the day’s challenges, maintaining your desired flawless finish.
Setting your concealer correctly and prepping your skin adequately are crucial for a long-wearing result. These steps create a barrier against transfer and natural skin oils, helping the product adhere better and reducing the need for constant touch-ups, ensuring your meticulous application lasts.
Setting Your Concealer
Setting your concealer is a vital step, particularly for the under-eye area and oily spots, to minimize creasing and extend wear. Powder helps to absorb excess oil and creates a barrier, preventing the concealer from migrating or fading throughout the day. However, the type of powder and application method are key to avoiding a dry or cakey finish.
- Translucent Setting Powder: This is generally the best choice as it doesn’t add extra coverage or color, allowing your concealer shade to remain true. Look for finely milled powders that won’t emphasize texture.
- Light Application: Use a small, fluffy brush or a damp beauty sponge to gently press (not swipe) a very thin layer of powder over the concealed area. Focus on areas prone to creasing, like under the eyes, but use sparingly.
For the under-eye area, wait a moment after applying concealer before setting. This allows the product to warm up and settle into the skin; gently tap away any creases before applying the powder to lock in smoothness. For blemishes and other areas, a light dusting is often sufficient to set the product without making it look heavy. The goal is to create a soft-focus effect that blurs imperfections and keeps your concealer in place without caking. A correctly set concealer looks seamless and lasts significantly longer, maintaining its efficacy for hours.
Touch-Ups and Reapplication Tips
Even with thorough setting, there may be times when a touch-up is necessary. Knowing how to refresh your concealer without disturbing your existing makeup is crucial for maintaining a polished look throughout the day. Strategic reapplication can restore coverage and brightness without creating a heavy or built-up appearance, keeping your complexion looking fresh.
- Assess Before Applying: Before reaching for more product, gently blot any excess oil with a blotting paper, especially on the T-zone. If creasing is an issue, gently pat the creased area with a clean, dry fingertip or sponge to smooth it out before adding more product.
- Minimal Product: For touch-ups, use a very small amount of concealer. Apply only to the areas where coverage has faded or where new imperfections have appeared. Less is always more when reapplying over existing makeup.
- Gentle Blending: Use your ring finger or a clean, small brush to lightly tap the fresh concealer into place, blending only the edges. Avoid rubbing or dragging, which can lift the foundation and concealer underneath, creating a patchy look.
If you prefer to carry a compact for touch-ups, consider a cream stick concealer or a small pot of liquid concealer for easy, on-the-go application. For a complete refresh, a quick mist of setting spray can also help to meld products together and give a revived, dewy finish. Touch-ups should be strategic and minimal, aimed at restoring freshness without adding unnecessary layers, ensuring your concealer continues to look natural and effective all day long.
| Key Point | Brief Description |
|---|---|
| 🎨 Match Undertone | Identify cool, warm, or neutral undertones for seamless blending. |
| ✨ Target Concerns | Use peach/orange for dark circles, green for redness, and skin-match for blemishes. |
| 💧 Choose Formula | Select liquid, cream, or stick based on skin type and desired coverage. |
| ⏳ Set & Touch-Up | Set with translucent powder and touch up minimally for lasting wear. |
Frequently Asked Questions About Concealer
For concealing blemishes, your concealer should ideally match your foundation or skin tone exactly to create a seamless, undetectable finish. However, for brightening the under-eye area, a concealer one to two shades lighter is often preferred for a lifting effect. It truly depends on the specific area and desired outcome.
To prevent creasing, first, ensure your under-eye area is well-hydrated. Apply a thin layer of concealer and blend it thoroughly. Immediately after, gently tap away any initial creases that form. Then, lightly set the area with a finely milled translucent setting powder using a damp beauty sponge or a fluffy brush, pressing the product in.
Color correcting uses shades opposite to your skin’s unwanted tones on the color wheel to neutralize them. For example, peach/orange corrects blue/purple dark circles, and green neutralizes redness. You need it if your standard concealer struggles to fully hide significant discoloration; it creates a more even base before concealer.
While some people occasionally use concealer for light, spot coverage instead of foundation, it’s generally not recommended for full-face application. Concealer is typically thicker and more pigmented than foundation, making it prone to looking heavy or cakey when applied broadly. Its purpose is to spot-correct and target specific areas, not provide overall coverage.
For matching your skin tone, swatch concealer on your jawline or a similar area of your face. For under-eye concealer, apply a small amount to the outer corner of your under-eye area and blend. Always check the shade in natural lighting to ensure the most accurate match, as store lighting can be deceiving.
Conclusion
Mastering how to choose the right concealer for your skin tone is an art that significantly refines your makeup application. By understanding your unique undertone, carefully selecting shades for specific concerns, and employing precise application techniques, you can transform your complexion, achieving a natural and flawless finish. Remember that the journey to perfect skin isn’t about hiding, but rather about enhancing your natural beauty with smart, strategic choices that empower your confidence from within.


