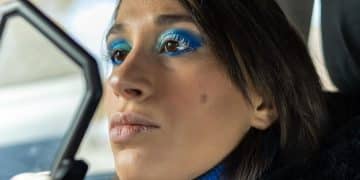
Master Eyeliner Like a Pro: Step-by-Step Guide
Anúncios
Achieving flawless eyeliner requires understanding different formulas, mastering application techniques, and practicing patience to enhance eye shape with precision and artistry.
Mastering the art of eyeliner application can elevate any makeup look from simple to stunning. It’s a skill that, once acquired, transforms an everyday routine into an act of precision and artistry, allowing for endless creativity and expression. This comprehensive guide, How to Apply Eyeliner Like a Pro: A Step-by-Step Tutorial, will walk you through everything you need to know, from choosing the right product to perfecting various styles.
Understanding Eyeliner Types and Formulas
Before diving into application techniques, it’s crucial to understand the diverse world of eyeliners. Each type offers unique benefits and challenges, influencing the final look and ease of application. Choosing the right formula can make a significant difference in achieving your desired effect, whether it’s a subtle enhancement or a dramatic statement.
The market is flooded with various eyeliner options, each designed for specific purposes and skill levels. Gel, liquid, pencil, and cream eyeliners are the primary categories, and familiarizing yourself with their characteristics is the first step towards professional application.
Pencil Eyeliner: The Beginner’s Best Friend
Pencil eyeliners are often recommended for beginners due to their ease of use and forgiving nature. They offer a softer, more natural look and are ideal for smudging to create smoky effects. They come in traditional sharpenable pencils and retractable twist-up versions.
- Pros: Easy to control, great for subtle definition, excellent for smudging.
- Cons: Can smudge easily if not set, less intense color payoff compared to liquids, may drag on the eyelid.
- Best Use: Everyday wear, tightlining, smoky eyes, softer looks.
Liquid Eyeliner: Precision and Drama
Liquid eyeliners are renowned for their intense pigmentation and ability to create sharp, precise lines. They are perfect for achieving a dramatic winged liner or a sleek, defined look. Liquid liners typically come in felt-tip pens, brush-tip pens, or pots with separate brushes.
- Pros: Highly pigmented, creates sharp and defined lines, long-lasting.
- Cons: Can be challenging for beginners, requires a steady hand, less forgiving of mistakes.
- Best Use: Winged eyeliner, graphic liner, strong definition.
Gel Eyeliner: Versatile and Long-Lasting
Gel eyeliners usually come in a small pot and require a separate brush for application. They combine the intensity of liquid liners with the blendability of pencils, offering a good balance for various styles. They are often waterproof and long-wearing.
- Pros: Opaque color, long-lasting, versatile for both sharp lines and smudging, often waterproof.
- Cons: Requires a separate brush, can dry out in the pot, less portable than pens.
- Best Use: Smokey lines, precise wings, tightlining.
Understanding these fundamental differences will guide your choice and help you achieve the desired outcome. Don’t be afraid to experiment with different types to find what works best for your skill level and preferred style. Each formula has its unique charm and can be a powerful tool in your makeup arsenal.
Essential Tools and Preparation for Flawless Application
Beyond choosing the right eyeliner formula, having the correct tools and preparing your eyelids properly are critical steps for achieving a professional finish. These often-overlooked details can significantly impact the ease of application and the longevity of your eyeliner. A well-prepared canvas ensures a smooth glide and prevents smudging or fading.
Just as an artist prepares their canvas, you need to prepare your eyelids. This involves creating an even, smooth surface that allows the eyeliner to adhere without creasing or smudging throughout the day.
The right brushes can make a world of difference, especially when working with gel or liquid pot eyeliners. Precision is key, and specific brush shapes are designed to deliver optimal control.
Preparing Your Canvas: The Eyelid Primer
An eyelid primer acts as a base, creating a smooth surface and helping your eyeliner (and eyeshadow) stay put longer. It also helps in neutralizing any discoloration on the eyelids, providing a true-to-color base for your makeup.
- Benefits: Increases longevity, prevents creasing, enhances color payoff, provides a smooth surface.
- Application: Apply a small amount of primer to your eyelids with your fingertip or a brush, gently patting it in. Allow it to set for a few seconds before proceeding.
Choosing the Right Brushes for Eyeliner
For gel liners or liquid liners in a pot, the brush you use is just as important as the product itself. Various brush types offer different levels of precision and control.
- Angled Brush: Ideal for creating sharp wings and precise lines. The angled shape allows for easy maneuverability along the lash line.
- Fine-Tip Brush: Perfect for intricate details and thin lines. These brushes have very fine points for ultimate precision.
- Flat-Top Brush: Useful for pressing gel liner into the lash line for a softer, more diffused look, or for tightlining.
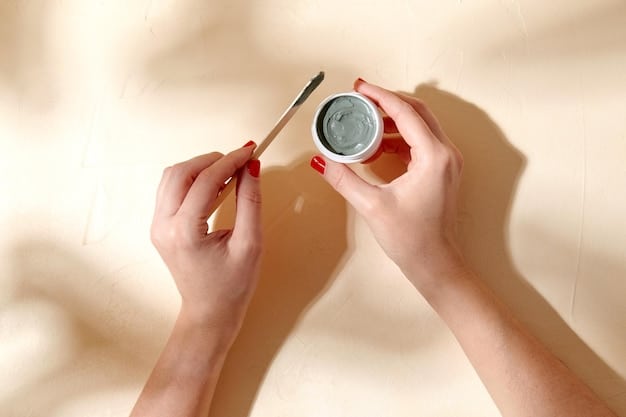
In addition to brushes, ensure you have cotton swabs and a good makeup remover for quick clean-ups and corrections. A magnifying mirror can also be incredibly helpful, especially when working on intricate details or if your vision isn’t as sharp as it once was. With the right tools and a properly prepped eyelid, you are ready to embark on the journey of mastering eyeliner application. Patience and a steady hand come with practice, so don’t be disheartened by initial attempts.
Mastering the Basic Eyeliner Techniques
Once you’ve selected your eyeliner type and prepared your lids, it’s time to delve into the core techniques. The fundamental goal of basic eyeliner application is to define the lash line, making your eyes appear larger and your lashes fuller. This section breaks down the essential steps, providing a solid foundation for more advanced styles.
Whether you opt for a subtle definition or a slightly more pronounced line, consistency and control are paramount. Don’t rush the process; a steady hand is developed through deliberate, slow movements.
The key to a successful basic eyeliner is to work in small sections rather than attempting one long, continuous line. This approach allows for greater control and minimizes mistakes.
The Dot-and-Dash Method
This technique is highly recommended for beginners as it offers an easy way to build a straight line without needing exceptional freehand skills.
- Step 1: Start by placing small dots or short dashes along your upper lash line, as close to the lashes as possible. Begin from the inner corner and work your way outwards.
- Step 2: Gently connect these dots or dashes using short, light strokes. Aim for a smooth, continuous line.
- Step 3: Once connected, you can thicken the line gradually if desired, working in small increments.
Tightlining for Subtle Definition
Tightlining involves applying eyeliner to the upper waterline, the inner rim of your upper eyelid. This technique creates the illusion of fuller, darker lashes without visible liner, perfect for a no-makeup makeup look.
- Step 1: Gently lift your upper eyelid, exposing the waterline.
- Step 2: With a waterproof pencil or gel liner and a flat brush, carefully dab or draw along the waterline, filling in the gaps between your lashes.
- Step 3: Blink a few times to settle the product. Be careful not to get product in your eyes.
Creating a Classic Thin Line
A classic thin line adds definition without overwhelming the eye. This is a versatile look suitable for any occasion.
- Step 1: Look directly into a mirror. Starting from the inner corner, draw a thin line along your upper lash line, staying as close to the roots of your lashes as possible.
- Step 2: Use short, connected strokes rather than one long swipe. This provides better control.
- Step 3: As you move towards the outer corner, you can slightly thicken the line if preferred, or keep it uniformly thin. Ensure the line ends cleanly with the natural curve of your lash line.
Remember that practice makes perfect. Don’t be discouraged if your first few attempts aren’t flawless. Eyeliner application is a skill that improves with consistency. Start with basic techniques and gradually move on to more complex styles as your confidence and precision grow. The foundation laid here will serve you well for any eyeliner look you wish to achieve.
Advanced Eyeliner Techniques: The Wing and More
Once you’ve mastered the basics, it’s time to venture into the captivating world of advanced eyeliner techniques. The winged eyeliner, also known as the cat eye, is arguably the most iconic and sought-after look. However, there are many other advanced styles that can dramatically change the perceived shape and expression of your eyes. These techniques require more precision and a steady hand but are incredibly rewarding once perfected.
The winged eyeliner is a timeless classic, but its execution can be daunting for many. The trick is to break it down into manageable steps and understand the angles that best suit your eye shape. Beyond the wing, exploring other advanced styles can unleash your creativity.
The beauty of advanced eyeliner is its ability to sculpt and define, transforming the eye area. From subtle elongations to bold graphic statements, the possibilities are vast.
The Perfect Winged Eyeliner (Cat Eye)
Achieving a symmetrical and sharp wing on both eyes is a skill that takes practice. Here’s a popular method:
- Step 1: Map it out. Using a small dot or a light dash, mark where you want your wing to end. This point should typically align with the end of your eyebrow or slightly angled upwards from your lower lash line.
- Step 2: Draw the bottom line of the wing. Starting from the outer corner of your lower lash line, draw a thin line upwards towards the mark you made in Step 1. This creates the angle of your wing.
- Step 3: Create the top line and connect to the lash line. From the tip of the line you just drew, draw a second line back down to meet your upper lash line, forming a triangle shape. Fill in the triangle.
- Step 4: Connect to the inner corner. From the inner corner of your eye, draw a thin line along your upper lash line to connect to the wing you just created, ensuring a smooth transition.
- Step 5: Refine and sharpen. Use a cotton swab with a tiny bit of micellar water or concealer to clean up any edges and sharpen the wing.
The Smokey Smudged Line
This technique offers a softer, more diffused look than a sharp wing, perfect for an evening outfit or a sultry gaze.
- Step 1: Apply a pencil or gel liner. Draw a slightly thicker line than usual along your upper lash line, and optionally, your lower lash line.
- Step 2: Smudge it out. Immediately after applying, use a smudge brush or a cotton swab to gently smudge the line upwards and outwards, softening the edges and creating a smokey effect.
- Step 3: Set with eyeshadow. To ensure longevity and prevent smudging, lightly pat a matching or slightly darker eyeshadow over the smudged liner.
Fishtail Eyeliner for a Unique Look
A fun and creative take on the classic wing, the fishtail eyeliner adds an extra element of visual interest.
- Step 1: Draw your regular winged eyeliner. Follow the steps for creating a perfect winged eyeliner.
- Step 2: Add a lower wing. From the outer corner of your lower lash line, draw a small, separate wing extending downwards and slightly outwards, parallel to your upper wing or in a slightly opposing direction.
- Step 3: Refine the gap. Ensure there’s a small, noticeable gap between the upper and lower wings, creating the “fishtail” effect.
Each of these advanced techniques requires patience and precision. Don’t be afraid to experiment with different eyeliner formulas and brushes to discover what works best for each style. With consistent practice, you’ll soon be able to execute these looks with confidence and artistry, truly transforming your eye makeup game.
Troubleshooting Common Eyeliner Mistakes
Even seasoned makeup artists encounter challenges with eyeliner. It’s a delicate art, and minor missteps can quickly become major frustrations. Understanding common mistakes and knowing how to troubleshoot them is as important as mastering the application itself. Being prepared to correct errors efficiently means less stress and a quicker path to a flawless finish. The goal is to correct without having to start all over again.
From shaky lines to uneven wings, eyeliner blunders are a universal experience. The key is not to panic, but to have a repertoire of quick fixes that resolve the issue without disrupting the rest of your makeup. Patience, a steady hand, and the right tools for correction are your best allies.
Learning from mistakes is part of the process. The more you identify and correct common issues, the better you become at preventing them in the first place, leading to a more efficient and satisfying application every time.
Uneven Wings: The Symmetrical Challenge
Achieving perfect symmetry between two wings is arguably the most difficult aspect of winged eyeliner. Often, one wing ends up longer, thicker, or at a different angle than the other.
- The Fix: Use a cotton swab dipped in a small amount of micellar water or makeup remover. Gently press the swab onto the areas that are uneven, wiping away the excess product to reshape the wing. For minor adjustments, a pointed cotton bud is ideal. Always err on the side of removing less and adding more slowly.
- Prevention: Work on both wings simultaneously, building them up in small increments on each eye. This allows for easier comparison and adjustment as you go.
Shaky or Wobbly Lines
A shaky hand can lead to uneven, wobbly lines instead of the desired smooth, crisp one. This is particularly common with liquid or gel liners.
- The Fix: If the line is only slightly wobbly, you can often fix it by drawing a second, slightly thicker line directly over the first to smooth it out. For more significant wobbles, use a fine-tipped brush with a bit of concealer to clean up the edges. Alternatively, for very wobbly sections, a q-tip with remover can correct small areas.
- Prevention: Anchor your hand! Rest your elbow on a table or counter, and use your pinky finger to anchor against your cheek. This provides stability. Also, apply in short, connected strokes rather than one long, continuous sweep.
Smudging and Transfer
Eyeliner smudging under the eye or transferring to the upper lid is a common annoyance, especially for those with oily eyelids or hooded eyes.
- The Fix: Gently blot the smudged area with a clean cotton swab or a tissue. If the smudge is stubborn, use a tiny amount of makeup remover on the swab. For transfer to the upper lid, use a clean Q-tip.
- Prevention: Always use an eyelid primer. After applying liquid or gel eyeliner, lightly set it with a matching or translucent eyeshadow using a small, flat brush. For hooded eyes, apply liner below the crease or use waterproof/smudge-proof formulas.
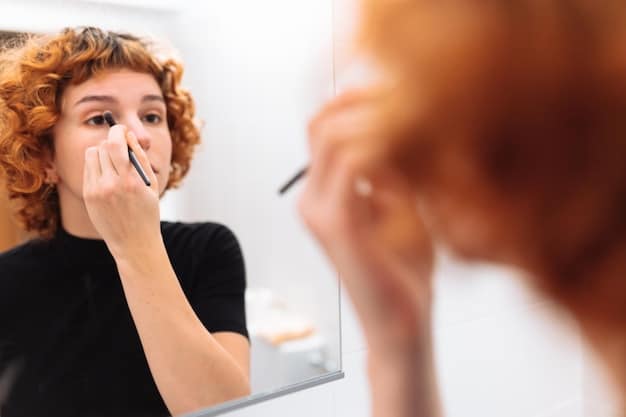
Don’t let a mistake discourage you. Eyeliner application, much like any skill, develops with practice and a good understanding of how to troubleshoot. By learning these common fixes and preventative measures, you’ll gain confidence and achieve consistently beautiful eyeliner looks. Remember, makeup is about personal expression, and mistakes are simply opportunities to learn and refine your technique.
Eyeliner for Different Eye Shapes
While a general approach to eyeliner application exists, tailoring your technique to your unique eye shape can dramatically enhance your features and create the most flattering look. Just as clothes fit different body types, eyeliner styles complement various eye dimensions. Understanding how to work with your specific eye shape is a crucial step towards mastering professional eyeliner application, moving beyond a one-size-fits-all approach.
Defining your eye shape is the first step in this personalized approach. Are your eyes almond-shaped, round, hooded, monolid, or downturned? Each shape presents unique opportunities and challenges for eyeliner application.
The goal is to use liner to create the illusion of balance, openness, and optimal definition, highlighting your natural beauty rather than fighting against it. Small adjustments can make a significant difference in the overall impact of your makeup.
Almond Eyes: The Universal Canvas
Almond eyes are considered ideal as they are naturally balanced and symmetrical. Almost any eyeliner style works well with this shape.
- Recommended Styles: A classic thin line that gradually thickens towards the outer corner, or a winged liner that follows the natural upward curve of the eye. Tightlining works beautifully to enhance lash fullness.
- Tip: You have the freedom to experiment with various thicknesses and wing lengths.
Round Eyes: Elongate and Define
Round eyes tend to appear more open. The goal with eyeliner here is often to elongate the eye and create a more almond-like appearance.
- Recommended Styles: Focus the bulk of the liner on the outer half of the eye. Start with a thin line at the inner corner and progressively thicken it towards the outer corner. A longer, angled wing that extends past the eye can create a beautiful elongating effect.
- Avoid: Heavy liner on the inner corner or along the entire lower lash line, as this can make round eyes appear even rounder.
Hooded Eyes: Peek-a-Boo Liner
Hooded eyes have a fold of skin that covers part of the eyelid, often making liner disappear when the eyes are open. The key is to apply liner so it remains visible.
- Recommended Styles: A “bat wing” liner or a thicker wing that’s visible when your eye is open. When applying, keep your eyes open and look straight ahead, then draw the wing based on where it will be seen. You might need to draw a slightly thicker line or a disconnected triangle that only connects when your eye is closed. Tightlining is also excellent for definition without taking up lid space.
- Tip: Use waterproof and smudge-proof formulas to prevent transfer onto the hood.
Monolid Eyes: Emphasize Length and Lift
Monolid eyes typically lack a visible crease. Eyeliner can be used to create depth and dimension.
- Recommended Styles: A thicker line that is visible when the eyes are open. Consider a graduated line that is thinnest at the inner corner and thickens significantly towards the outer corner. A graphic liner or a bold winged liner can create a stunning statement. Lower lash line liner can also add balance.
- Tip: Experiment with different textures, like liquid liners for precise, bold lines.
Downturned Eyes: The Lifting Effect
Downturned eyes have outer corners that point downwards. Eyeliner can be used to create an uplifting effect.
- Recommended Styles: Focus on lifting the outer corner. Start your wing slightly above the actual downturn, angling it upwards significantly. Keep the line on the inner and middle parts of the top lash line thinner to avoid emphasizing the downward slope. Avoid extending liner too far down on the lower lash line.
- Tip: A small flick of white or nude liner on the lower waterline can also help open up the eye.
By understanding and adapting your eyeliner technique to your specific eye shape, you can significantly enhance your natural beauty. Experimentation is key; what works for one person may not work for another, even with the same eye shape. Practice different styles and observe how they affect your features until you find what makes your eyes truly shine.
Maintenance and Lifespan of Your Eyeliner
Achieving a professional eyeliner look isn’t just about application; it’s also about ensuring it lasts throughout the day and beyond. Proper maintenance of your eyeliner products and techniques for prolonging wear are essential for a consistently flawless appearance. Just like any other cosmetic product, eyeliners have a lifespan and require care to maintain their efficacy and hygiene. Neglecting these aspects can lead to less precise application, smudging, or even eye irritation.
From the moment you open a new eyeliner, its clock starts ticking. Understanding how to store it, when to discard it, and how to prevent it from fading or smudging throughout your day are key components of professional eyeliner use.
Good habits in product care not only ensure maximum performance but also protect the delicate eye area from potential bacterial growth and irritation.
Product Storage and Expiration
Eyeliner products, especially liquid and gel formulas, have a relatively short lifespan once opened due to their susceptibility to bacterial contamination, particularly around the eyes.
- Liquid and Gel Liners: Typically last 3-6 months once opened. The applicator or brush can introduce bacteria, and the product can dry out or change consistency.
- Pencil Liners: Can last up to 1-2 years because they are regularly sharpened, removing the outer layer that might come into contact with bacteria.
- Storage: Store all eyeliners in a cool, dry place away from direct sunlight. Ensure caps are tightly closed to prevent drying out.
Always note the “period after opening” (PAO) symbol, a small icon resembling an open jar with a number and letter (e.g., 6M for 6 months), on your product packaging. Discard any eyeliner that changes in consistency, color, or develops an unusual odor, regardless of the PAO. This is a crucial step in preventing eye infections.
Tips for Prolonging Eyeliner Wear
Even the longest-wearing eyeliner can benefit from a few extra steps to ensure it stays put all day (or night).
- Always Use a Primer: As mentioned earlier, an eyelid primer creates a smooth, oil-absorbing base that helps eyeliner grip and stay in place without creasing or fading.
- Set with Eyeshadow: After applying liquid or gel eyeliner, lightly pat a matching or translucent eyeshadow over the liner. This “sets” the liner, preventing smudging and increasing its longevity. Use a small, flat brush for precise application.
- Waterproof Formulas: If you struggle with smudging, especially in humid conditions, or if your eyes tend to water, invest in waterproof or water-resistant eyeliner formulas. These are designed to withstand moisture.
- Avoid Touching Your Eyes: Habitually touching or rubbing your eyes can cause eyeliner to smudge and wear off prematurely. Be mindful of this habit, especially throughout the day.
By implementing these maintenance practices and wear-prolonging tips, you can ensure your eyeliner looks as fresh at the end of the day as it did when you first applied it. This attention to detail reflects a truly professional approach to makeup application, ensuring both aesthetic appeal and eye health.
| Key Aspect | Brief Description |
|---|---|
| 🎨 Eyeliner Types | Gel, Liquid, Pencil, each with unique application and finish pros/cons. |
| 🛠️ Essential Tools | Primer, angled/fine-tip brushes, cotton swabs for a smooth, precise application. |
| ✅ Basic Techniques | Dot-and-dash, tightlining, and classic thin lines for fundamental definition. |
| 🔄 Troubleshooting | Fixing uneven lines, wobbles, and smudges with cotton swabs and correctives. |
Frequently Asked Questions About Eyeliner Application
For beginners, pencil eyeliner is generally recommended due to its ease of control and blendability. It offers a softer look and is more forgiving of mistakes, making it easier to correct or smudge for a diffused effect. Gel pot eyeliners with an angled brush can also be relatively easy to maneuver once you get the hang of holding the brush steadily.
To prevent smudging, always start with an eyelid primer to create a clean, oil-free base. After applying your eyeliner, especially liquid or gel formulations, you can lightly set it with a matching eyeshadow or translucent powder. Opting for waterproof or smudge-proof eyeliner formulas also significantly increases longevity, particularly if you have oily eyelids or live in a humid climate.
It is generally not recommended to use liquid eyeliner directly on your waterline. Liquid formulas typically contain ingredients that can irritate the delicate eye area or even cause infection if introduced into the eye itself. For tightlining or applying product to the waterline, a kohl or gel pencil eyeliner specifically designed for this purpose is safer and more effective, offering better adherence and less risk.
Achieving symmetrical winged eyeliner is a common challenge, but patience and a systematic approach help. The trick is to work on both eyes simultaneously, building up the wing in small, comparable steps rather than completing one eye before starting the other. Use the “dot” or “dash” method to mark your desired wing endpoint and angle on both sides before connecting the lines. Minor corrections with a fine-tipped cotton swab and a dab of makeup remover can refine symmetry.
Choosing the right eyeliner color depends on your desired look and eye color. Black is a classic for dramatic definition, while brown offers a softer, more natural appearance, especially for lighter hair or eyes. Navy or plum can make blue or green eyes pop, respectively. For everyday wear, consider shades that complement your lash color. Experiment with colored liners to express your unique style and enhance specific eye colors.
Conclusion
Mastering eyeliner application is an art that combines product knowledge, precise technique, and continuous practice. From understanding the nuances of different formulas to adapting styles for various eye shapes, each step contributes to achieving a polished, professional look. While challenges like uneven wings or smudges are common, they are also opportunities for learning and refining your skills. The journey to becoming proficient in eyeliner is driven by patience, a willingness to experiment, and the right tools. By embracing these principles, you can confidently transform your eye makeup, adding depth, definition, and personal expression to your beauty routine, proving that practice truly makes perfect in the pursuit of the flawless line.
